PDF printing on Windows Server 2003...in 2023 😱

I really enjoy making old technology do things once thought impossible. This past winter, my organization wanted to explore what it would take to produce PDFs of invoices from our depreciated Windows NT Jbase accounting application. Natively, the app can only send print jobs to NT printers on the server and none of the PDF solutions I found were compatible. So I spent some time developing a solution using open source software to get around this limitation using CUPS (Common Unix Printing System) running on Ubuntu server coupled with a PDF-generating virtual printer app called CUPS-PDF. This solution elegantly enables native PDF generation largely transparant to the Jbase app and Windows Server 2003. Here's how I did it.
Setup Ubuntu Server with CUPS
Download and install Ubuntu Server 22.04 LTS 64-bit on either a VM or bare-metal machine with default options and OpenSSH enabled. I recommend at least 2048MB of RAM and 64GB SSD space. Connect it to the same subnet as the Windows Server.
Once installed, login and update to retrieve the latest packages and repositories
sudo apt-get update
sudo apt-get upgrade
Install CUPS and CUPS-PDF
sudo apt-get install cups
sudo apt-get install cups-pdf
Edit the CUPS configuration file to enable admin access to the web interface
sudo nano /etc/cups/cupsd.conf
Under # Only listen for connections from the local machine, delete all of the Listen parameters and replace them with
Port 631
Under # Show shared printers on the local network turn browsing on
Browsing On
There are 4 sections labeled #Restrict Access to...
Mark Allow all on the last line of each section's Location tag. For example:
# Restrict access to the server...
<Location />
  Order allow,deny
  Allow all
</Location>
Save and quit Nano
Add your username to the lpadmin group to allow you to administer the CUPS server
sudo usermod -aG lpadmin username
Restart the CUPS service
sudo systemctl restart cups.service
You should now be able to access the CUPS web interface in your web browser
http://your_server_ip:631/admin
Setup a PDF virtual printer
By default, CUPS-PDF creates a virtual PDF printer and adds it to the CUPS printer list. We will use this printer for our purposes and modify it to place the PDF files in the right location. Configuration files for CUPS printers are stored in /etc/cups. The default PDF printer has a configuration file called cups-pdf.conf Open it in Nano
sudo nano /etc/cups/cups-pdf.conf
Scroll to the Path Settings section and locate the #AnonDirName line and uncomment it. Here we define the path where anonymous jobs sent to this printer are outputted. All the jobs coming from our Windows Server 2003 server will be unauthenticated so will land in this directory. By default this is set for /var/spool/cups-pdf/ANONYMOUS. Let's change it to somewhere in our home directory
AnonDirName /home/user/PDF
There are other settings in this file that allow you to add prefixes, change security settings, setup logs etc. For our purposes, simply defining the output directory is sufficient.
Save and quit Nano. Restart CUPS service
sudo systemctl restart cups.service
For reference, there is a directory in /etc/cups called ppd. This is where all added CUPS printers store their corresponding ppd or PostScript Printer Description files. These files contain settings for the capabilities of each printer and the corresponding media they support including dimensions, margins, etc. The per-defined defaults are generally fine however, for the types of documents I needed to produce, tweaking the print areas and margins became necessary for a visually pleasing PDF. While we don't need to change anything for this guide, it's good to be aware of in case your PDFs aren't formatting as expected.
Navigate to the web admin page for the PDF printer and try a test page. It should arrive in the /home/user/PDF folder as a PDF.
Add PDF printer to Windows
Let's get creative. In order for older Windows applications like Jbase to send print jobs to CUPS, we need to setup a virtual printer that looks like a local printer. This local printer will use a Minolta PageWorks print driver but have the port modified to send jobs using the CUPS IPP address instead of a local LPT port. To do this, let's first add the port in Windows Server 2003 by adding the PDF printer as a network printer.
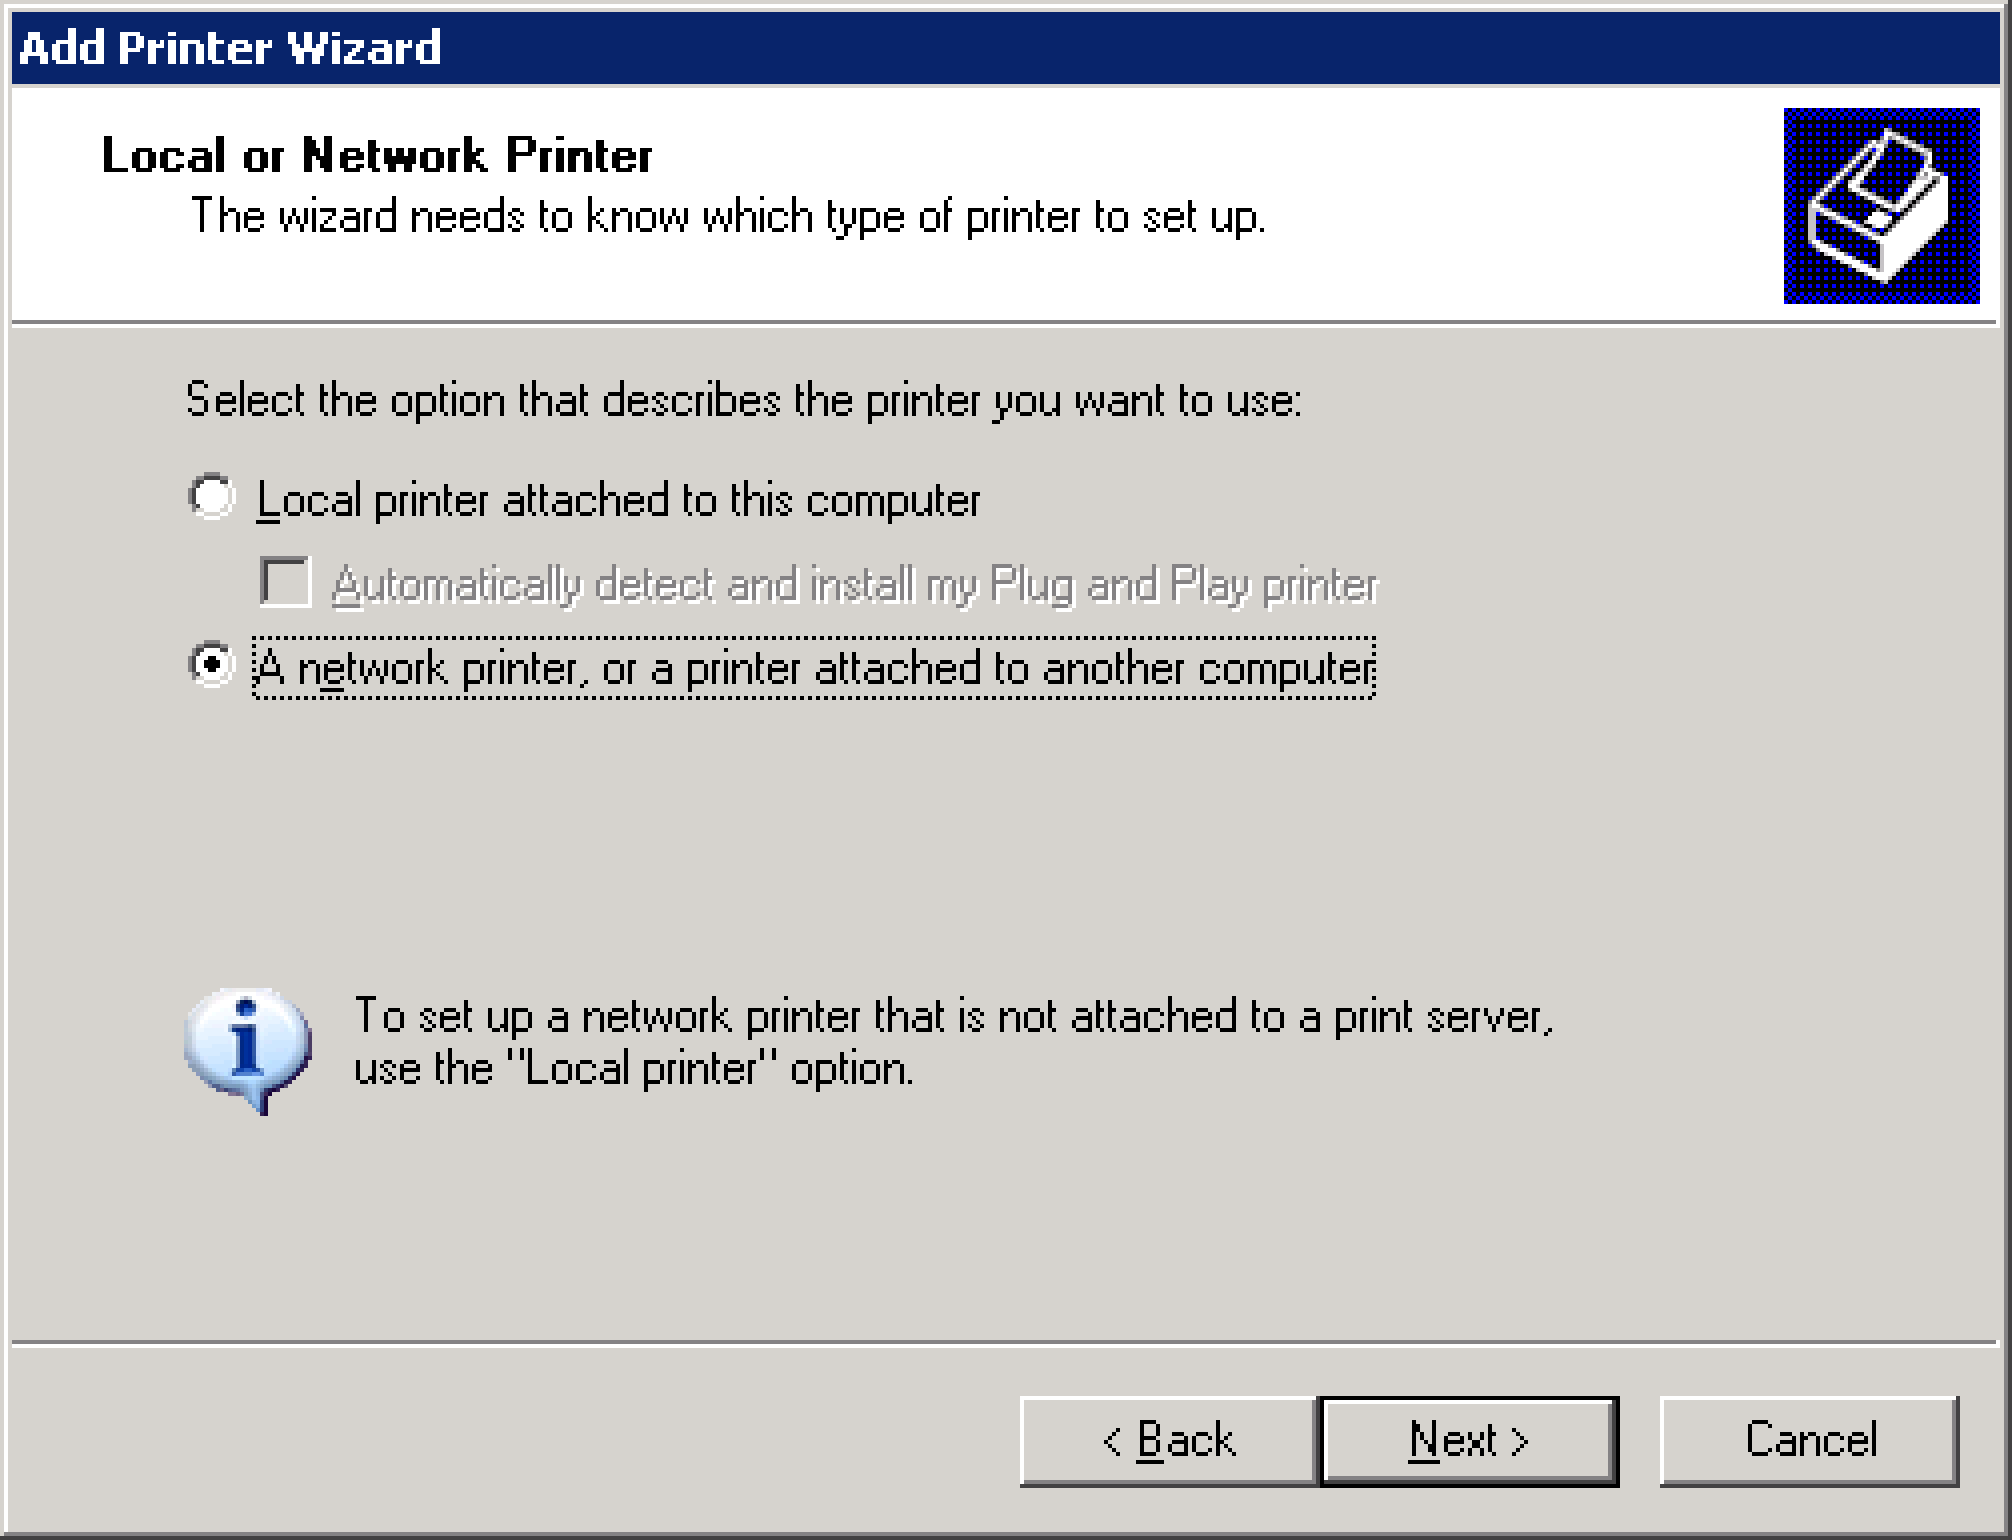
On Windows Server 2003, navigate to Printers and Faxes on the Start menu and launch the Add Printer wizard. Click Next > and select the radio button for A network printer, or a printer attached to another computer and click Next >
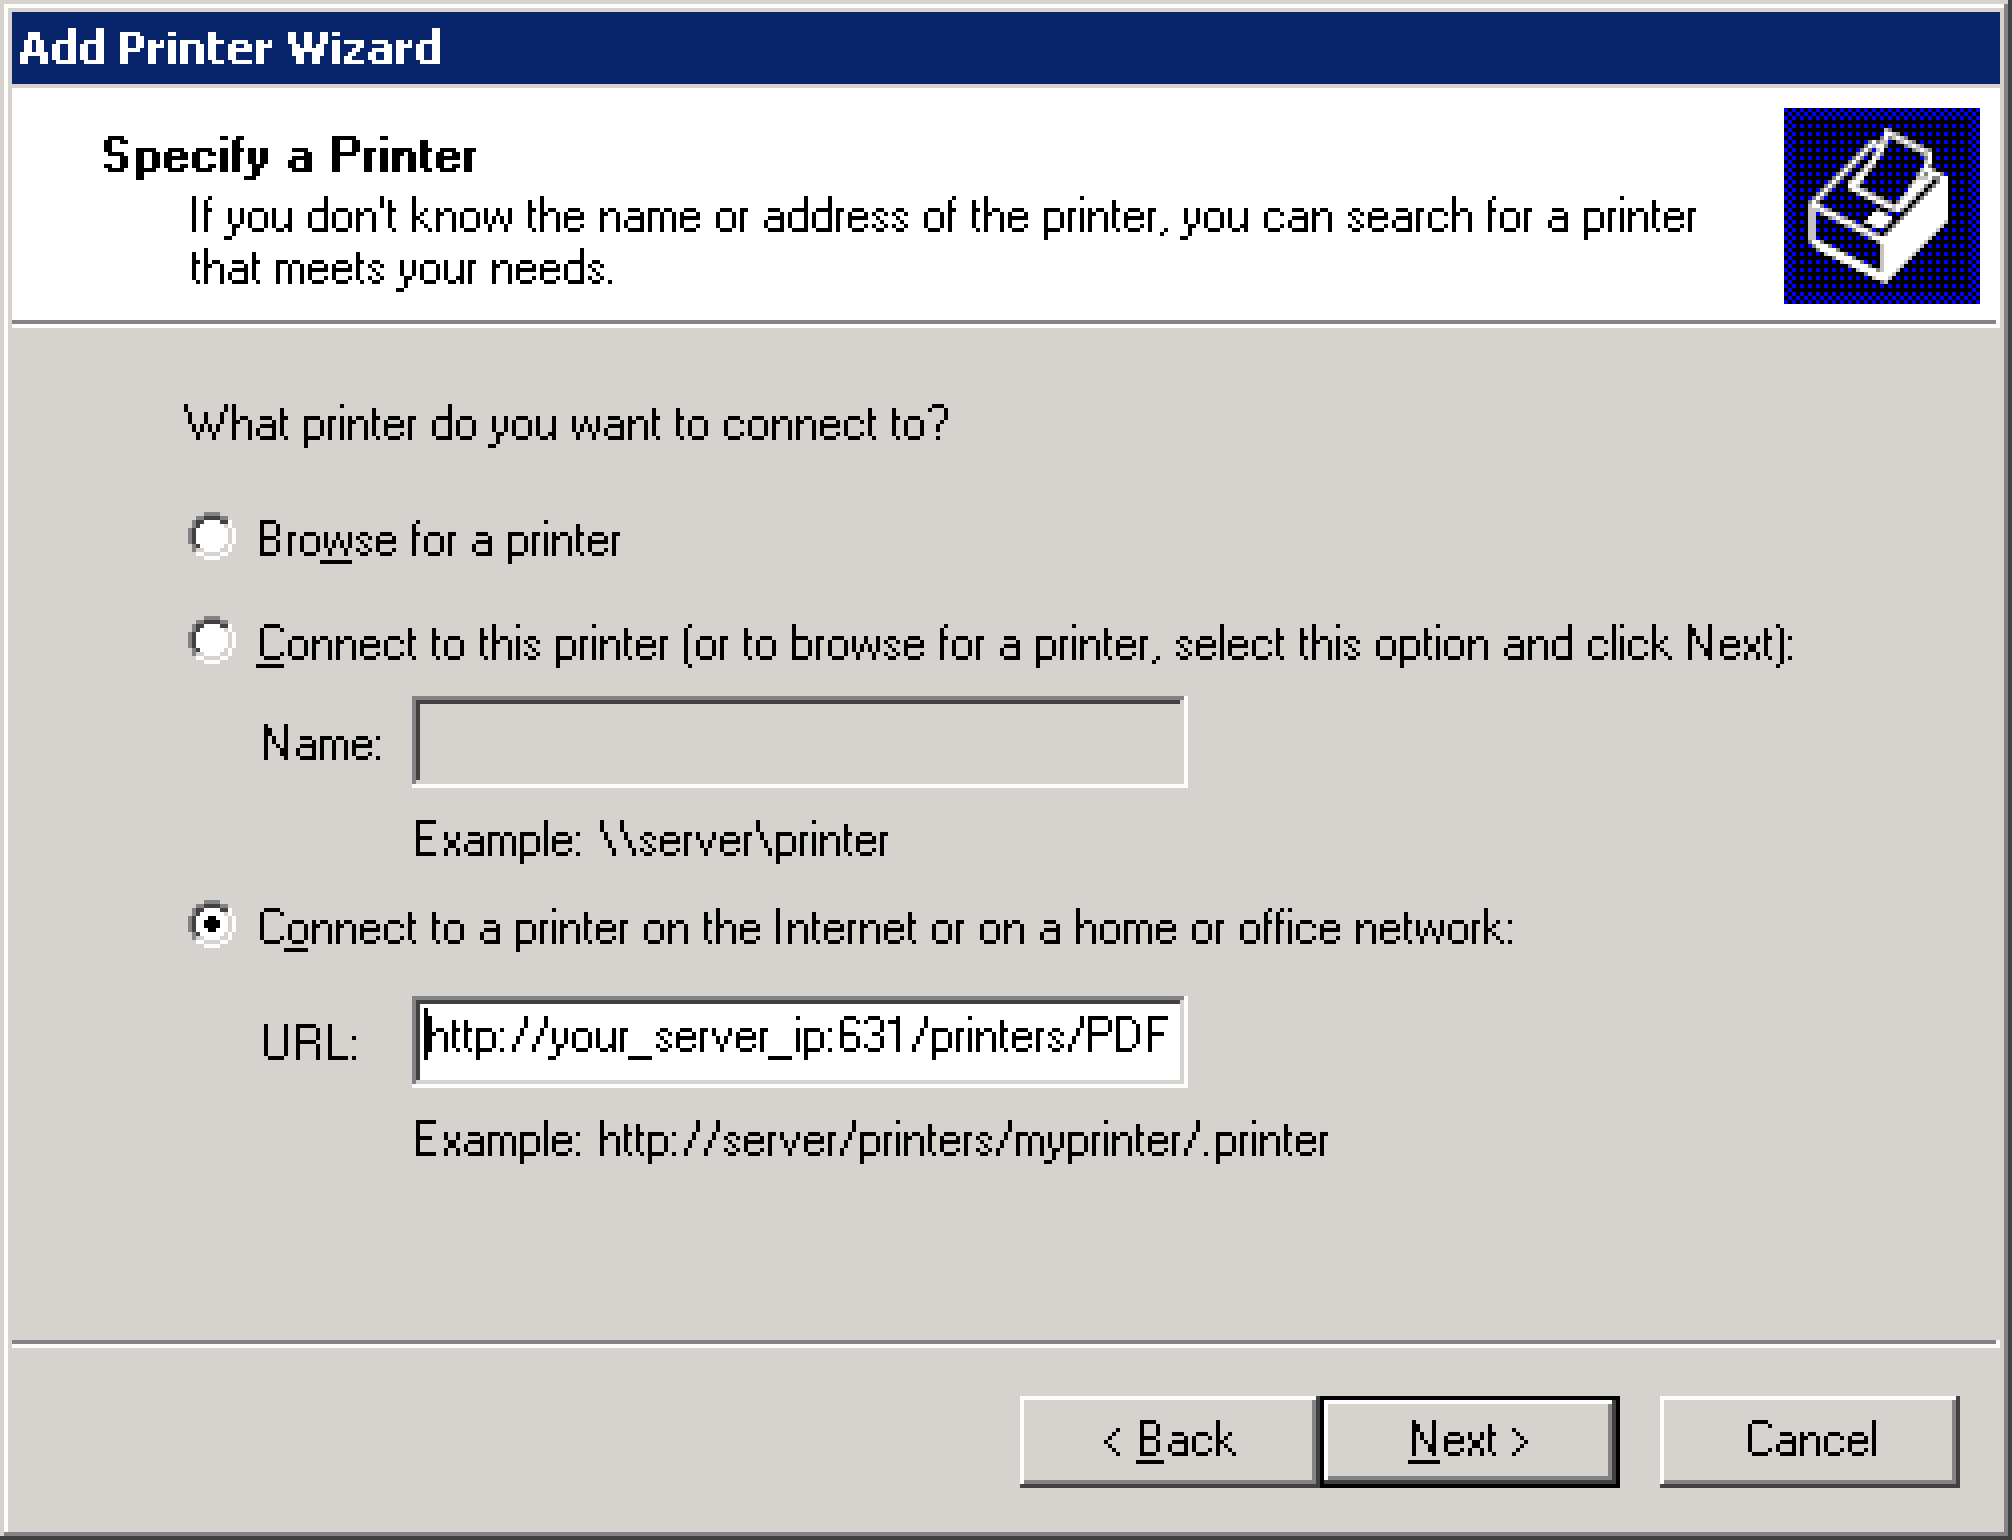
On the Specify a printer screen, select the Connect to a printer on the Internet or on a home or office network radio button and copy/paste your CUPS printer url in to the field. Make sure keep the port 631 in place but remove https and replace it with http. Windows Server 2003 will not connect to IPP printers over SSL natively so simply use a the standard http port.
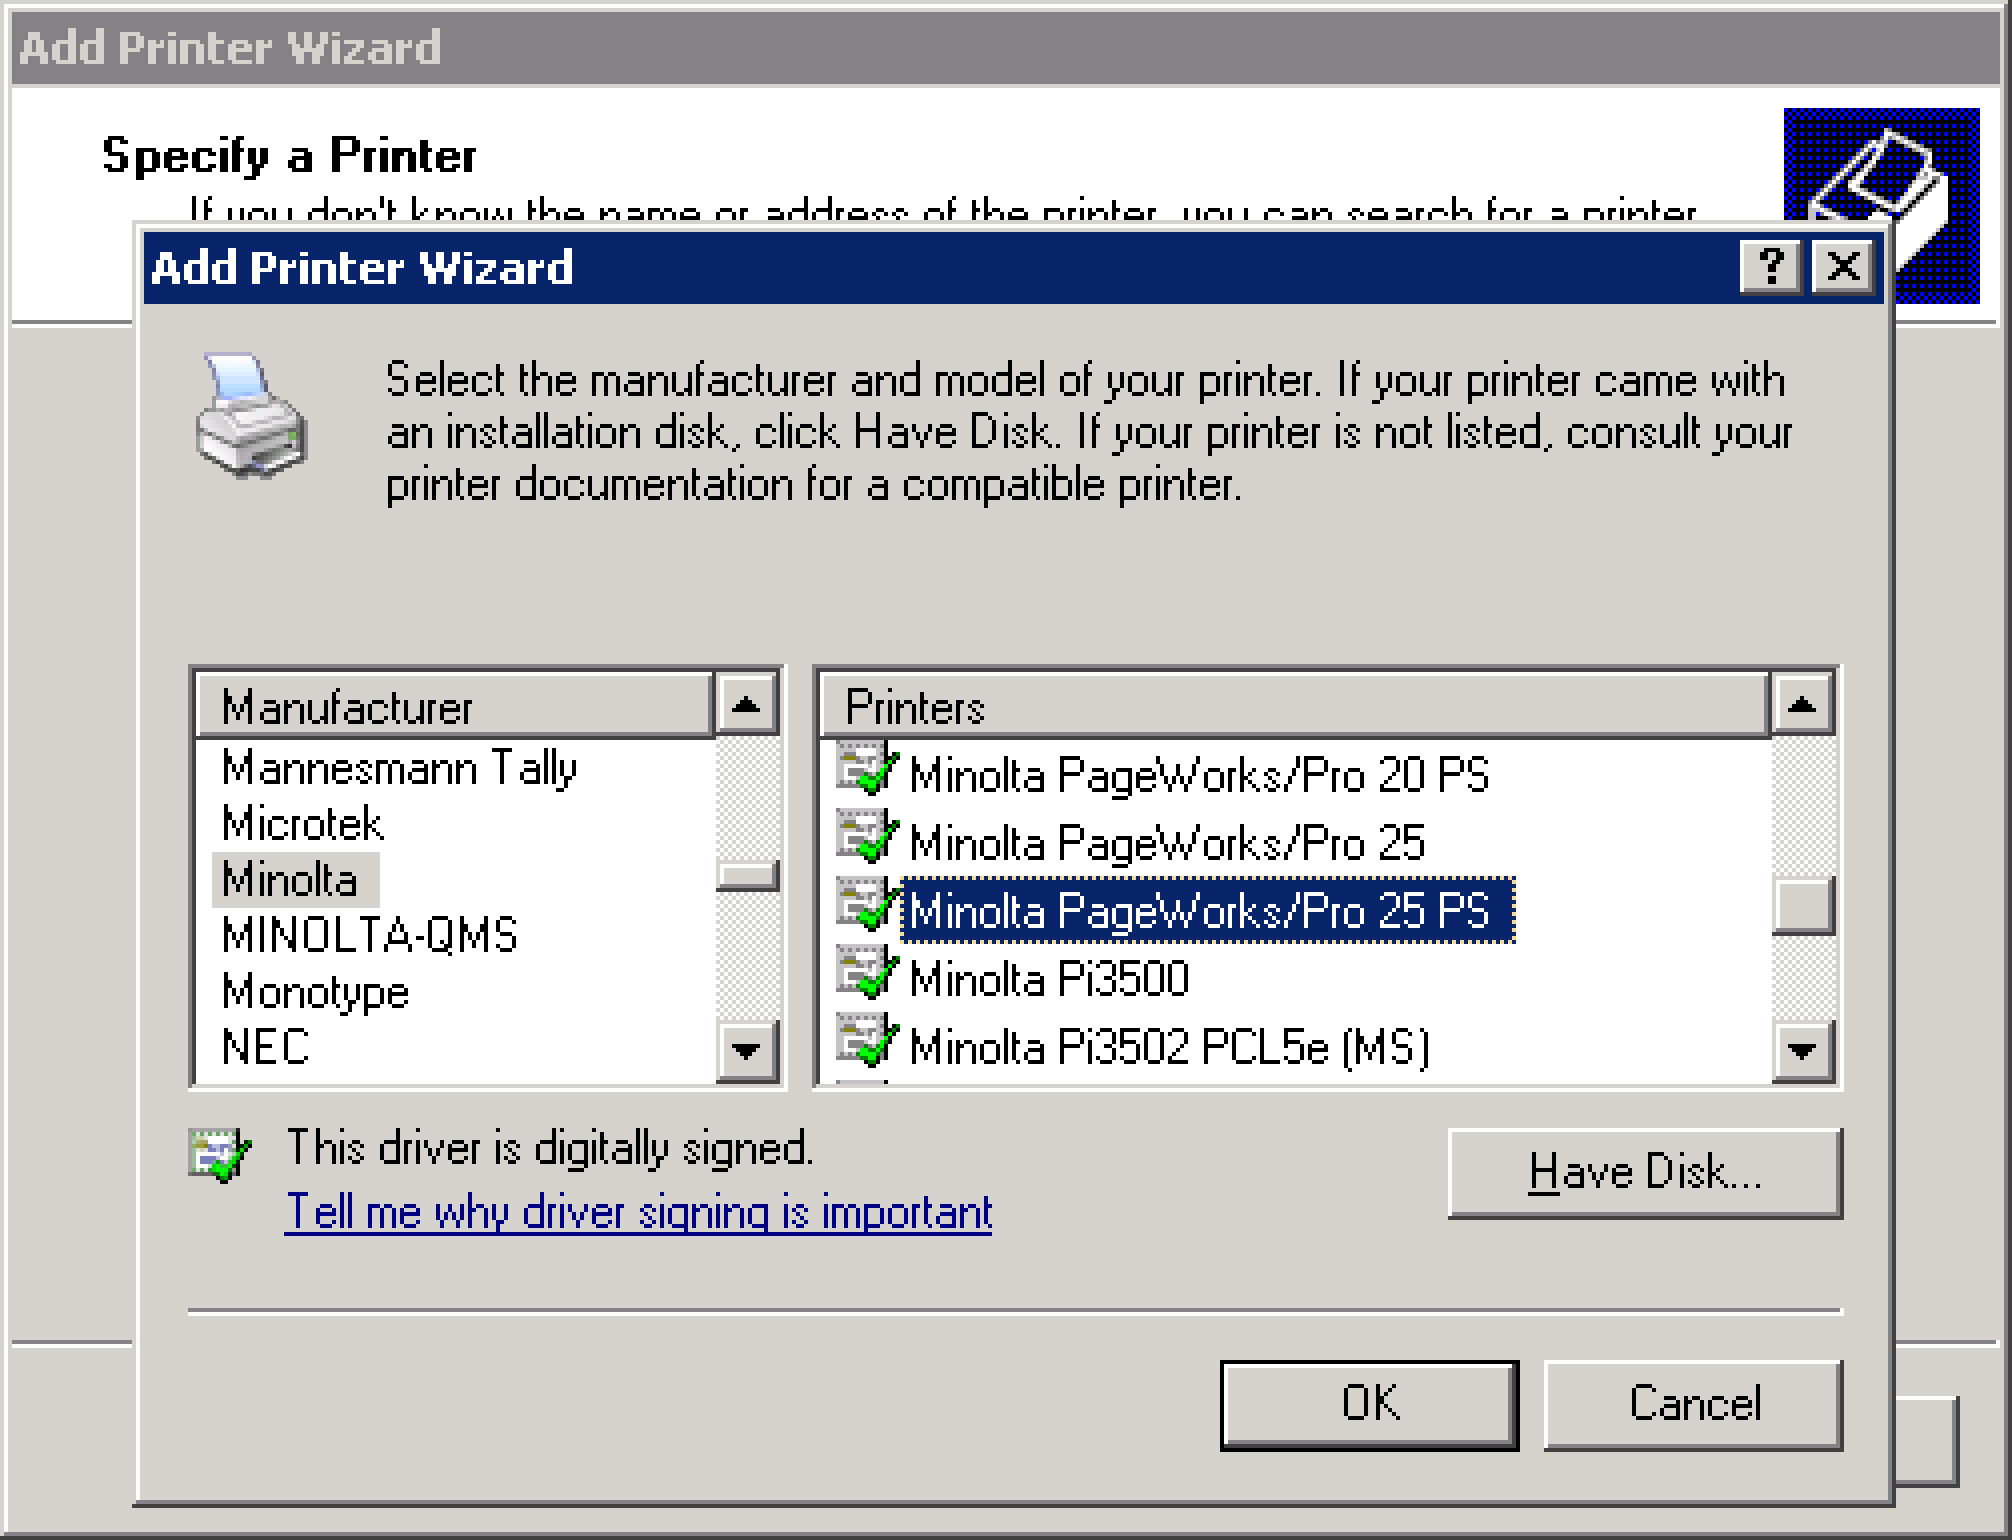
Click Next > and specify the print driver Windows will use to send jobs to the printer. CUPS-PDF recommends using a Minolta PageWorks driver and I've found good sucess with the PageWorks/Pro 25 PS driver.
Click OK and follow the rest of the prompts to finish the wizard. Your virtual printer will now be added to the list of network printers and you can send jobs to it. At this point, we can use the printer for applications that support printing to it however, for my purposes, I needed to go a step further and create a local printer that would send to the server as the Jbase app can not send to network printer over IPP.
The solution is simple. Since we added a IPP printer port for the printer already, all we need to do is go back to the Add Printer wizard and this time, on the first screen, select Local printer instead of networked. Then on the next screen, in the Use the following port: dropdown, select the port we just created. It will be listed by the http URL for the printer
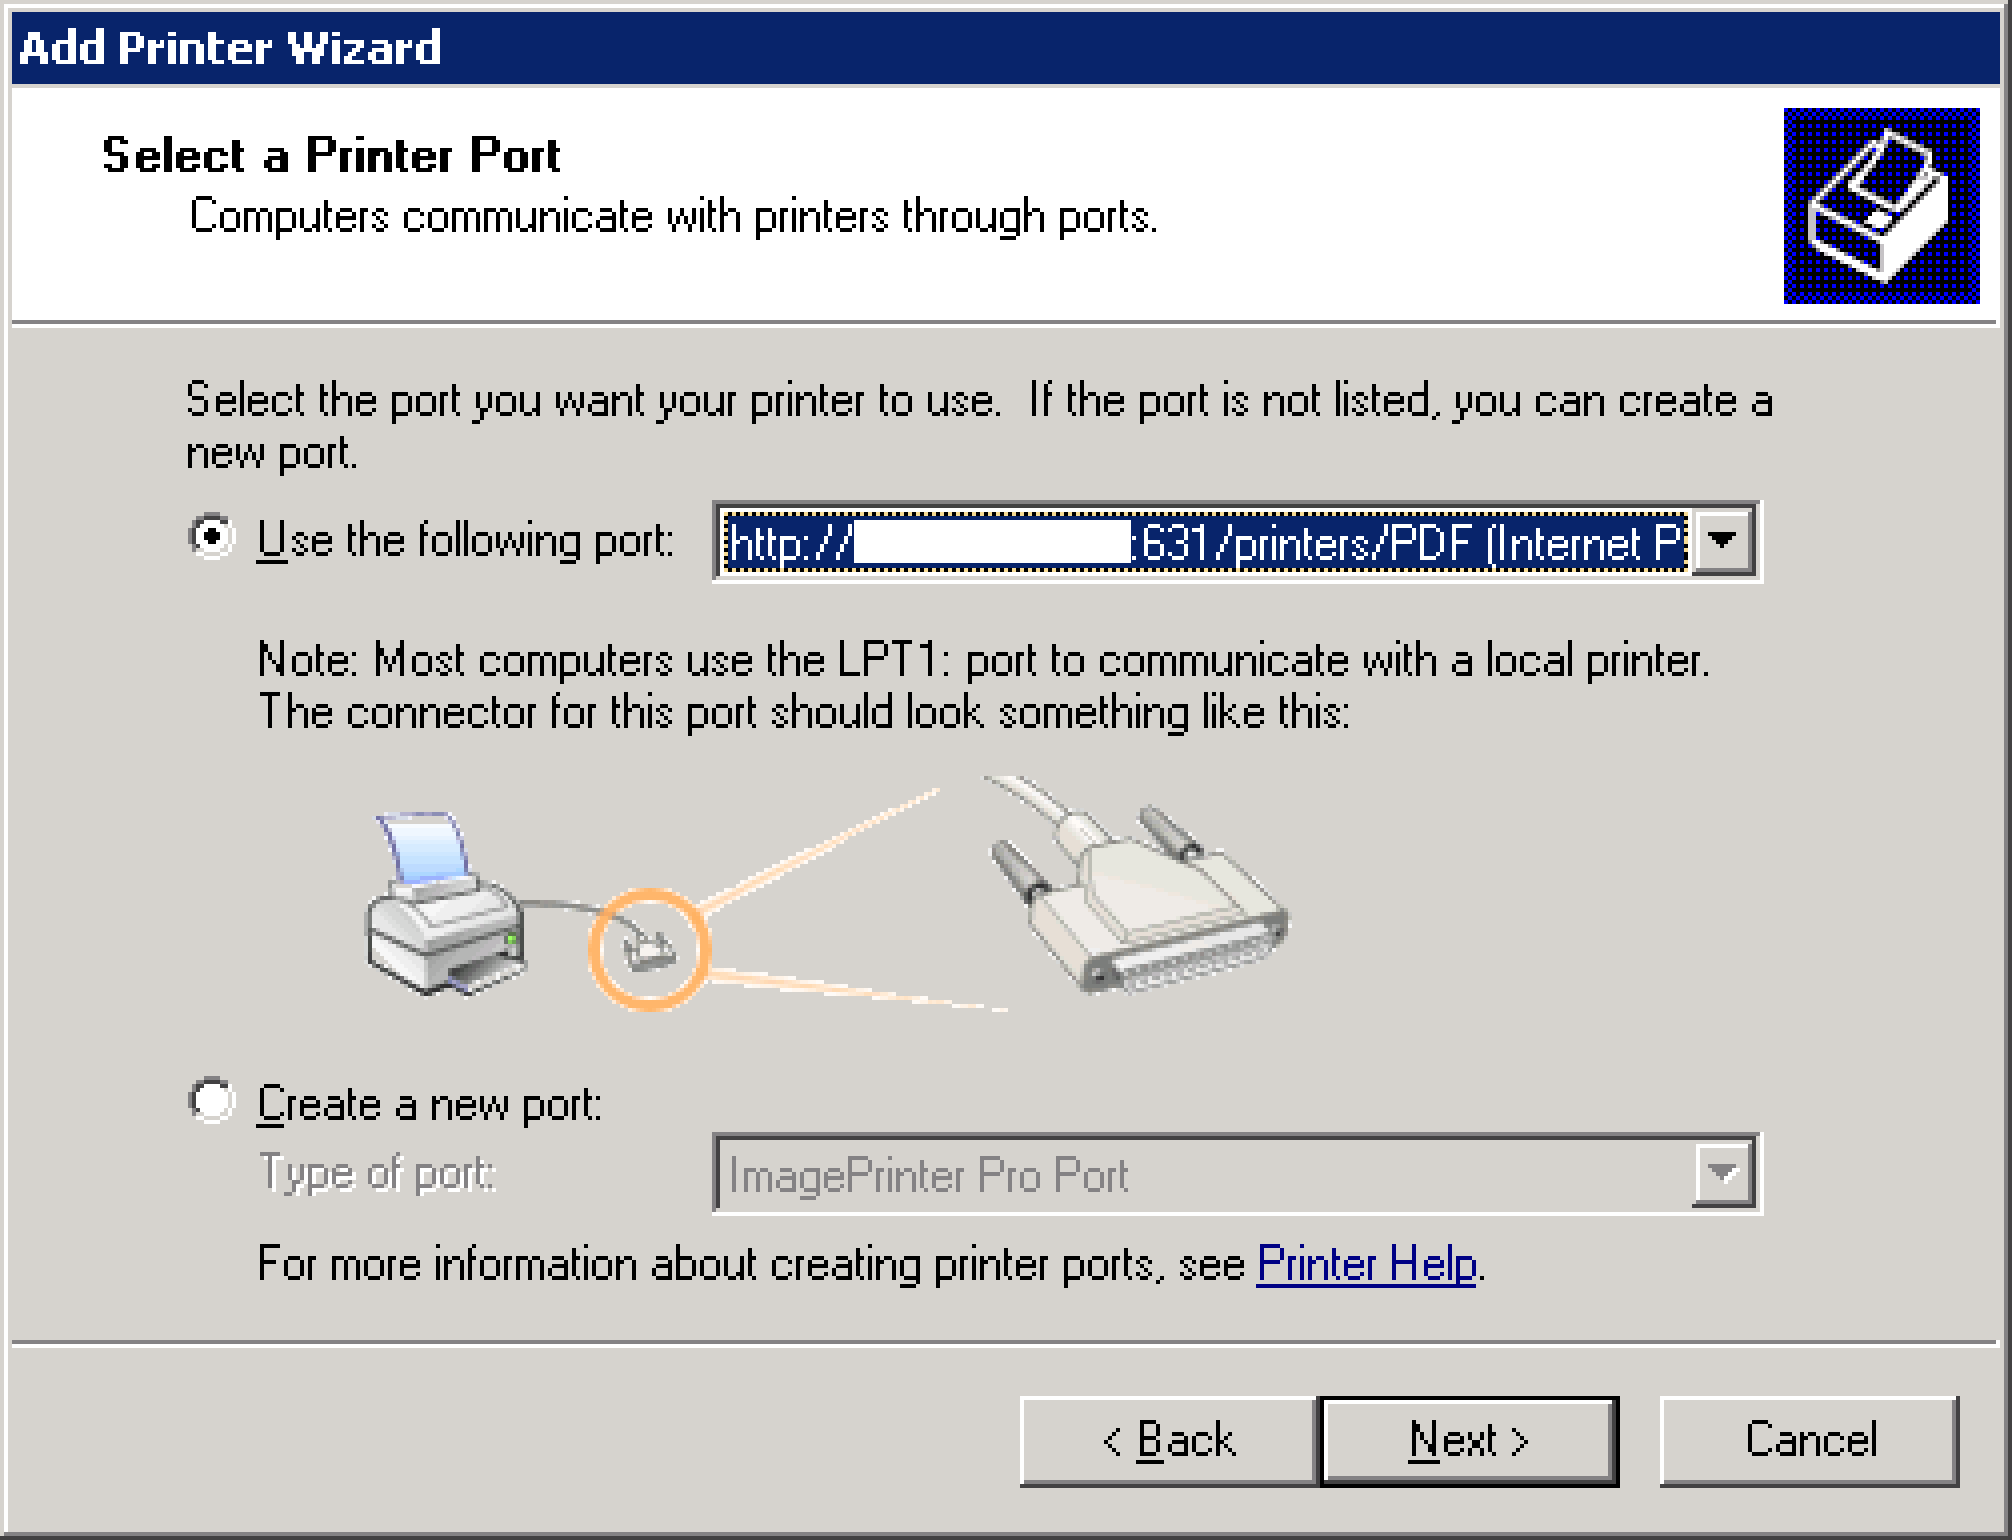
The wizard should automatically select the Minolta PageWorks/Pro 25 PS driver. Select Keep existing driver (recommended) on the next screen. On the Name Your Printer screen, you can name the printer anything you'd like. For my purposes, I named it F25 which matched the naming convention of the Jbase appliaction. Follow the rest of the prompts to finish the wizard. I recommend printing a test page to make sure it's all working.
And that's it! This printer will function like a locally attached printer but will send. the print jobs to CUPS to generate PDFs. From the Jbase and Windows side, this looks and functions like a normal printer.
Additional setups can be made on the Ubuntu server to place the PDFs in a shared location or even install a headless Dropbox for syncing the files. In future articles, I will detail solutions I designed using shell scripts to automatically rename documents based on their contents and perform tasks like emailing invoice copies to clients etc.
For more infromation on CUPS, CUPS-PDF and the Ubuntu CUPS setup, see these links: