Switch to Fedora Linux: a beginners guide
Well the end is nigh for Windows 10, and a lot of people are abuzz about switching to alternative operating systems in particular after recent missteps by Microsoft like Windows Recall and the disease of AI spreading mindlessly into things like Word. Even if they aren't intercepting your data to train their AI now, the potential is there and as with any capitalist entity, profits trump ethics every time. I trust none of them.
So for PC users, what are the alternatives? Thankfully, community driven open source operating systems do exist and are quite respectable in terms of native compatibility with apps you already use such as Chromium-based browsers, Firefox, Spotify, WhatsApp, Discord, Zoom, OBS, Steam, Dropbox and many others. And it's never been easier to make the transition with large communities supporting their respective platforms and distributions.
There's really cool projects like Fyde OS which is a fork of Chrome OS Flex that's been "de-Googled" to remove the harmful bits that Google infects Chrome with. If all you do is in-browser, then Fyde might be a great alternative for you however, I will not be covering it in this guide. For this guide, I'm going to focus on desktop Linux and in particular, my favorite distribution: Fedora Linux Workstation.
Fedora is the upstream source for Red Hat Enterprise Linux and CentOS Stream, with many bleeding edge technologies landing first in Fedora before being integrated into other systems. It is very well supported both by the community and Red Hat. It's also remarkably stable and mature in spite of it's bleeding edge posture. If you have ultra new hardware, chances are Fedora will support it sooner than other distros.
This guide will walk you through step-by-step how to install Fedora Workstation 42 and get up and running quickly. It is geared toward the total novice who hasn't installed an operating system before. System configurations do vary and I will try to cover as broad as possible the things you will expect to encounter. Any Intel or AMD PC made in the last 10 years with 4GBs or more of RAM will be be adequate for this task however, there are a few things that may cause headaches such as an Nvidia graphics card. It is recommended that you install an AMD Radeon graphics card at least until we get through the setup.
Other considerations such as disabling SecureBoot may be necessary if your PC has that enabled. That can be switched off in the BIOS (low level of the computer that controls things like where to load the OS, hardware settings, etc.) Refer to your computer's manufacturer for more details on where to find these settings on your PC.
You will need at least an 8GB or higher USB stick to create the install media.
Step 1. Pre-install checklist
Alright, let's begin with a preliminary checklist. You've decided to dump Windows and move to Fedora. What's next?
Backup your data
The very first thing to do is back up your data onto an external storage device. This is vital. If you don't have an external hard drive, stop reading now and go buy one. Your data is precious and unique. We will be completely overwriting your hard drive in this process and you will loose everything stored there.
Inventory what applications are vital for you
Look, we all use our computers for different things and it's important that you can continue to do those things successfully on Linux before making the jump. If you depend on some obscure Windows app for something you can't live without, or that you need to access work then Linux might not be best for you. Inventory all the applications you use and see if there are Linux ports or Linux alternatives you can live with. Do your research and feel confident about making the switch.
Consider upgrading your storage
Now is an excellent time to replace your old hard drive or SSD with a fresh new one that has more storage and greater speed. In-fact, if you can swing it, buying a replacement hard drive means you can keep your old hard drive in-tact with Windows installed on it in case you need to make the switch back.
Install an AMD Radeon graphics card
If you have a PC with built-in graphics from Intel or AMD, then this step is not necessary however, if you are running a PC with an Nvidia graphics card, it's highly recommended that you replace it temporarily with an AMD card. Nvidia cards are notoriously finicky in Linux and while support has improved lately, it's a lot less of a headache to simply use a AMD card to complete the setup process. I will not cover using an Nvidia card in this guide.
Check hardware compatibility
Most hardware will just work out of the box, but it's best to double check if all your expansion cards (USB devices included) are compatible in Linux. Most finger print readers won't work or will require a lot of technical know-how to function. Some older wireless cards won't work either. If your system was made within the last 10 years, especially laptops, then you should find broad hardware support but not all vendors are the same. Lenovo Thinkpads offer the greatest chance of full hardware support on Linux as Lenovo has made Linux compatibility a priority for it's customers.
Consider firmware updates
A lot of vendor hardware updates are performed from Windows applications. When you move to Linux, you may be unable to update the firmware without booting into Windows. Consider this before making the switch. Having Windows on a separate partition on the hard drive is possible but I will not be covering that in this guide. However, if you decide to upgrade your hard drive and keep the old one with Windows on it, you can always reinstall it for firmware updates and then remove it once those updates are complete (this is what I do.)
Step 2. Create bootable install media
Once you have gone through the above pre-install checklist, the next thing to do is create bootable media so you can restart the computer and launch the Fedora live installer. To do this, we need to create a bootable USB stick.
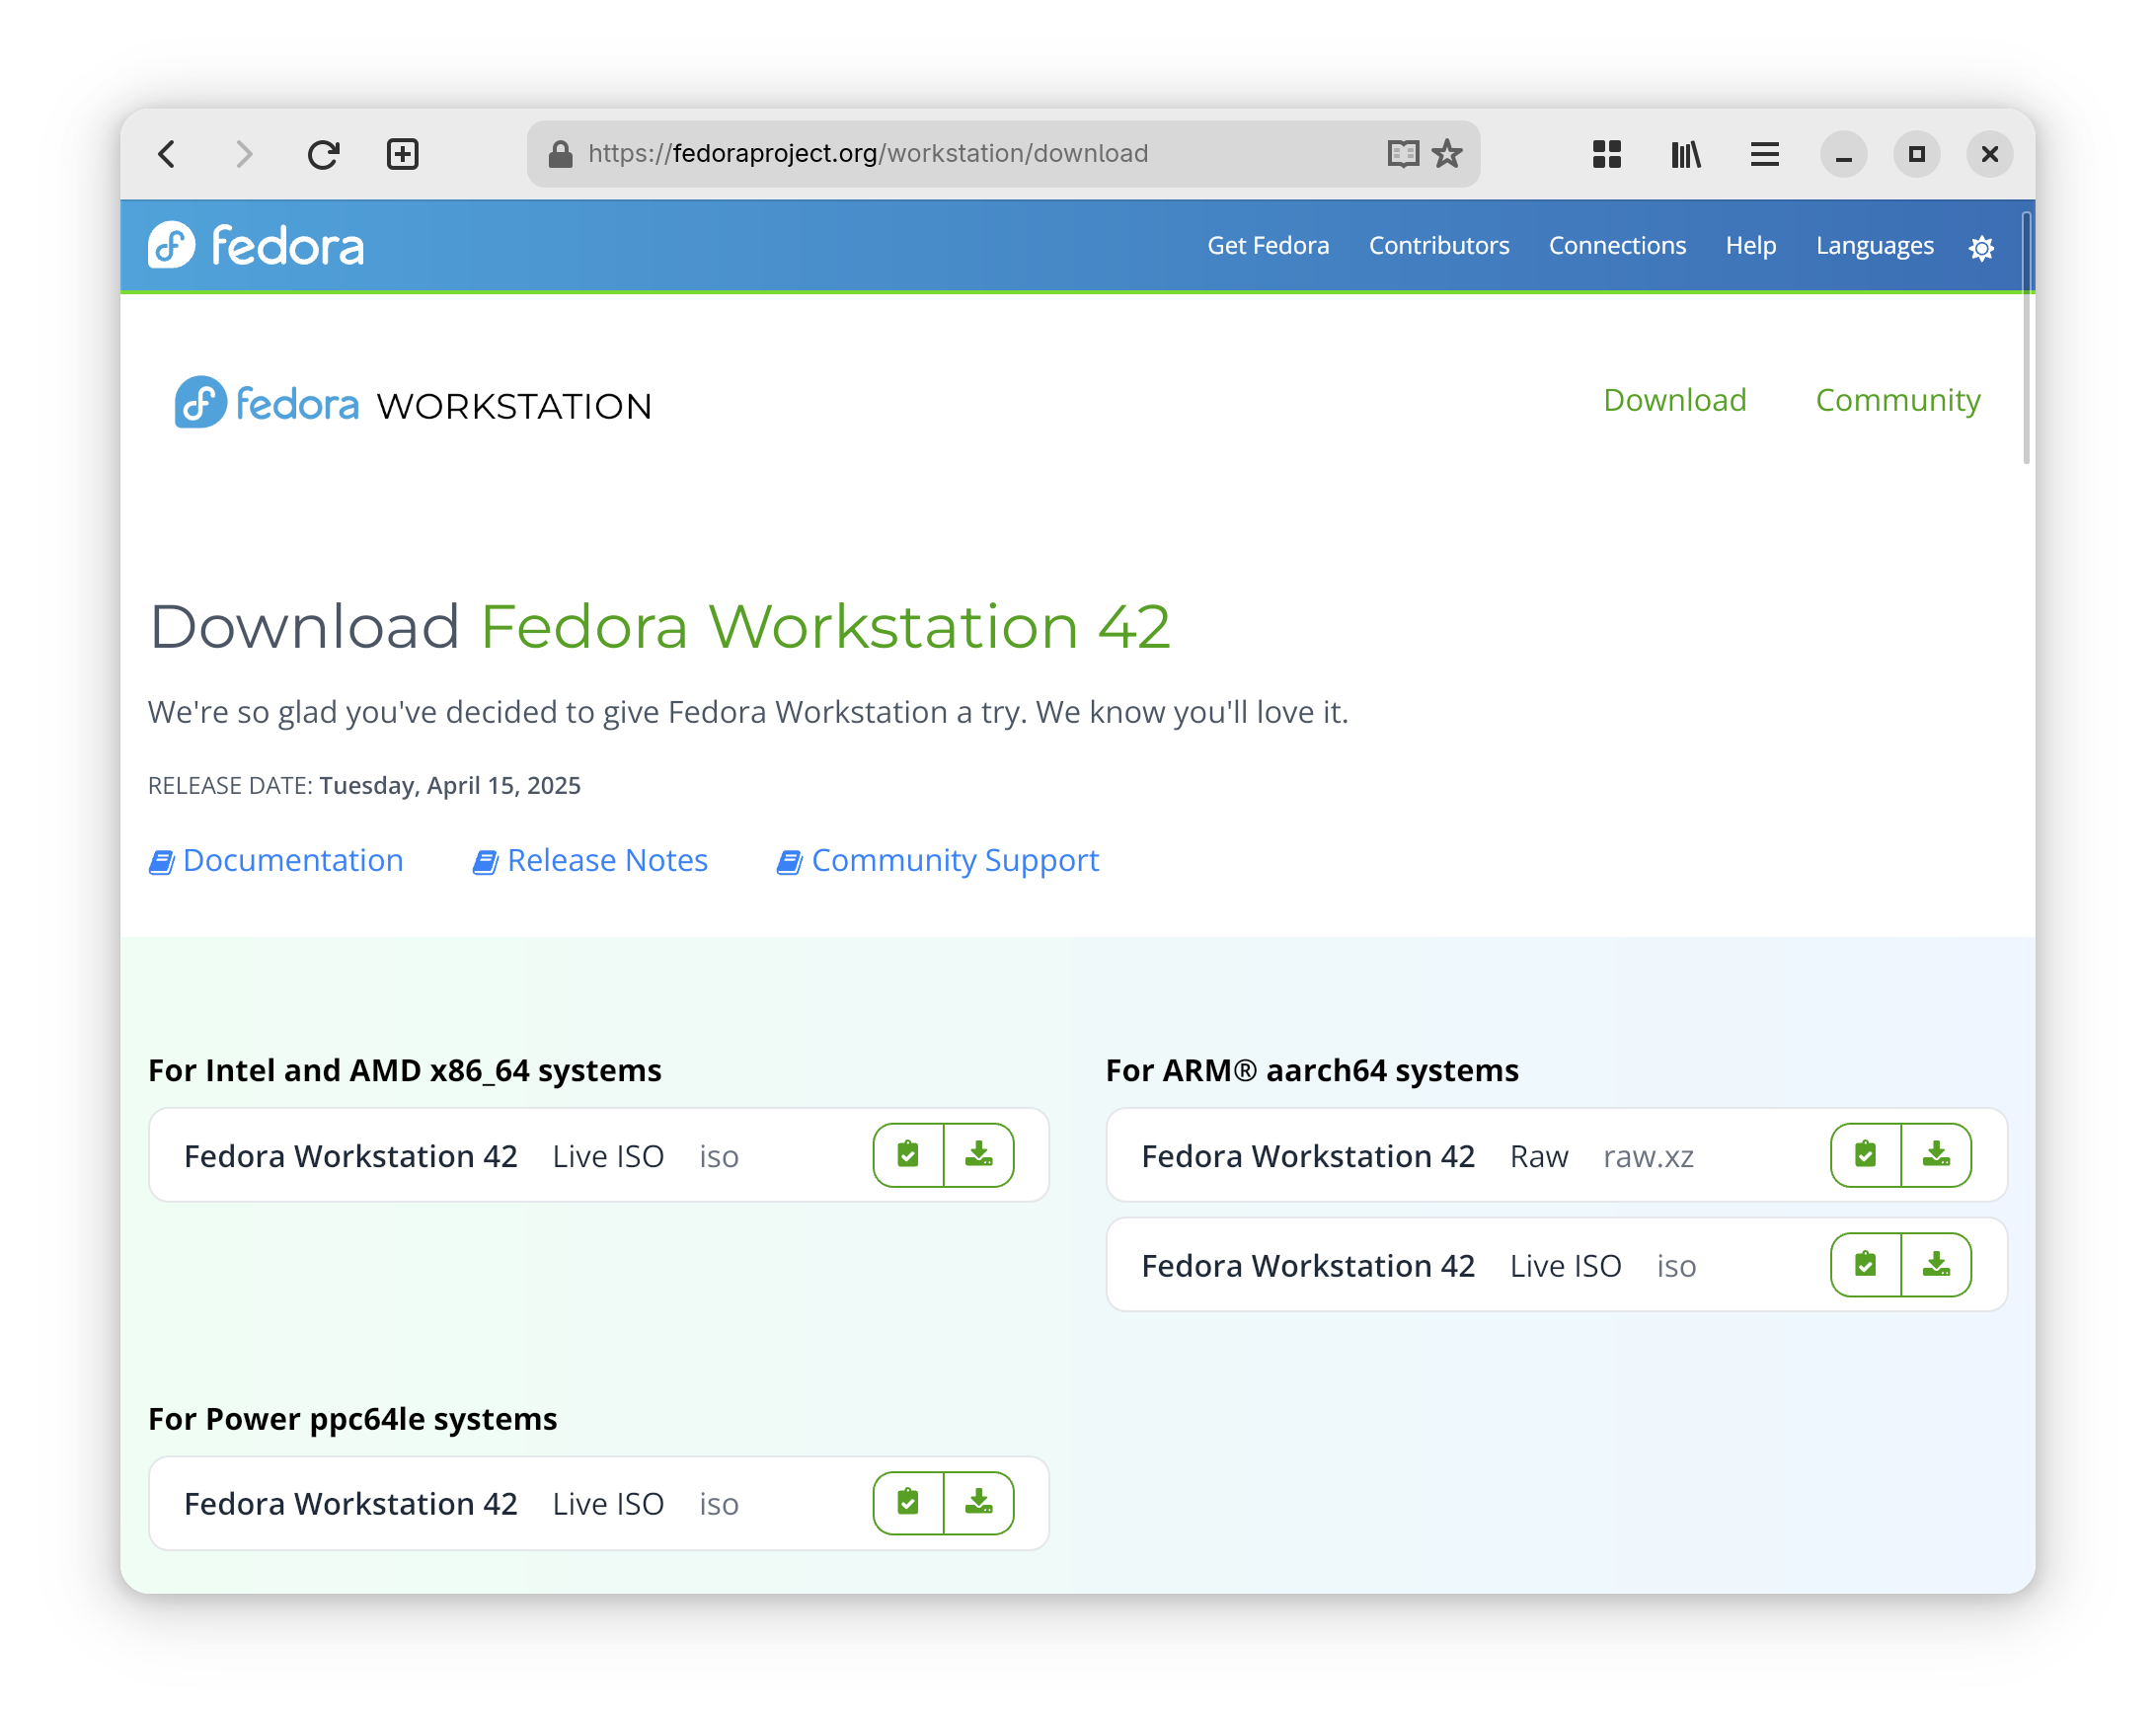
First let's download the latest version of Fedora Workstation from fedoraproject.org. Select the Live ISO image for Intel and AMD x86_64 systems. The current version is 42 and the ISO comes in at 2.2GB.
Once you have the ISO downloaded, we need to download a Windows app that allows us to take this image and write it to the USB drive in a bootable way. The app that does this is called Balena Etcher and it can be downloaded from etcher.balena.io
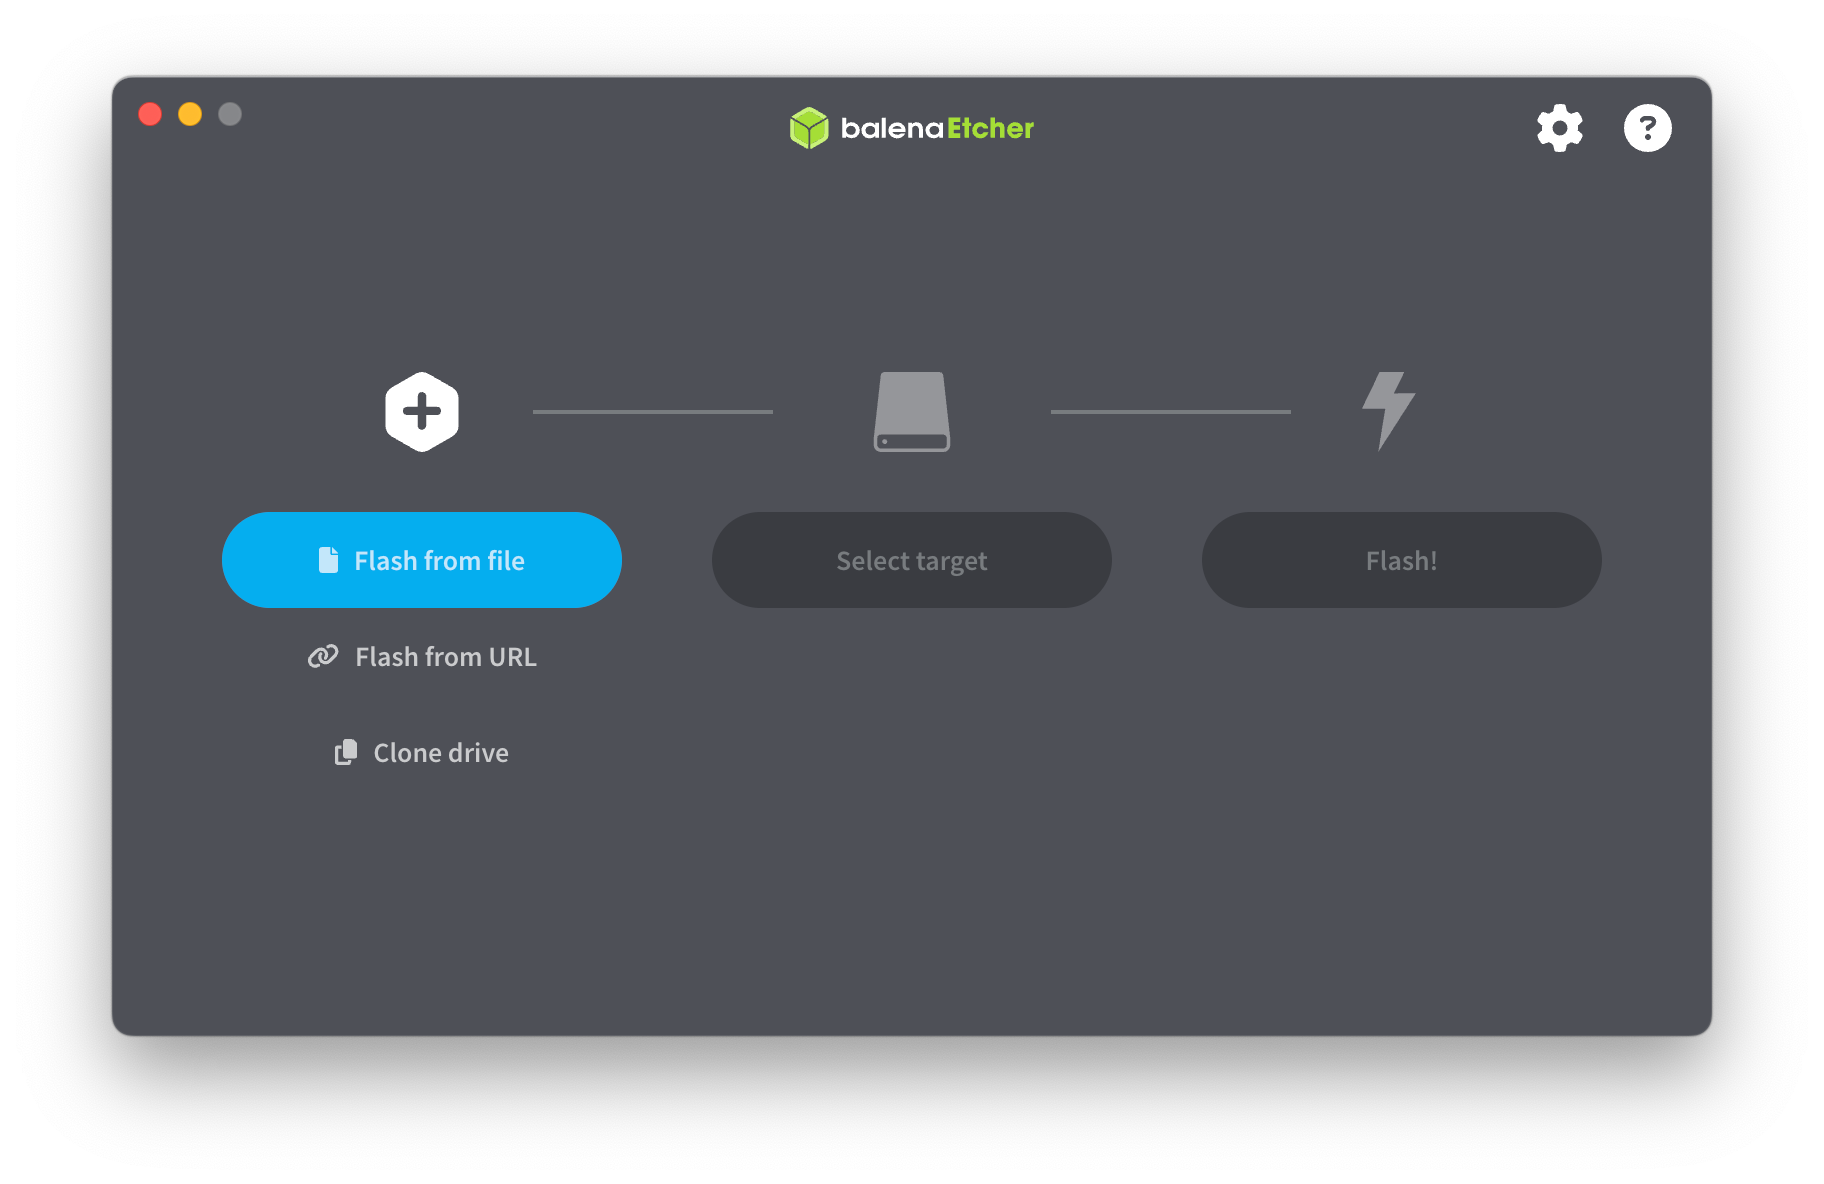
Once installed, insert your USB drive, open it up and select the ISO image we downloaded, select the USB drive as the target and then click Flash!. Depending on the write speed of your USB drive, this may take a few minutes. Once complete, you can safely shutdown your computer, leaving the USB drive inserted.
Step 3. Reboot into Fedora from USB stick
Depending on your computer, you will need to press a boot override key such as Del, F2, F12, Esc, Enter, etc to allow you to bypass the hard drive and boot from the USB drive instead. Check with your computer manufacturer for instructions on how to do this. Lenovo, for example, requires pressing Enter and then F12 to access the one-time boot menu. Turn on the computer and then press the key and select the USB drive option to boot your system off the USB.
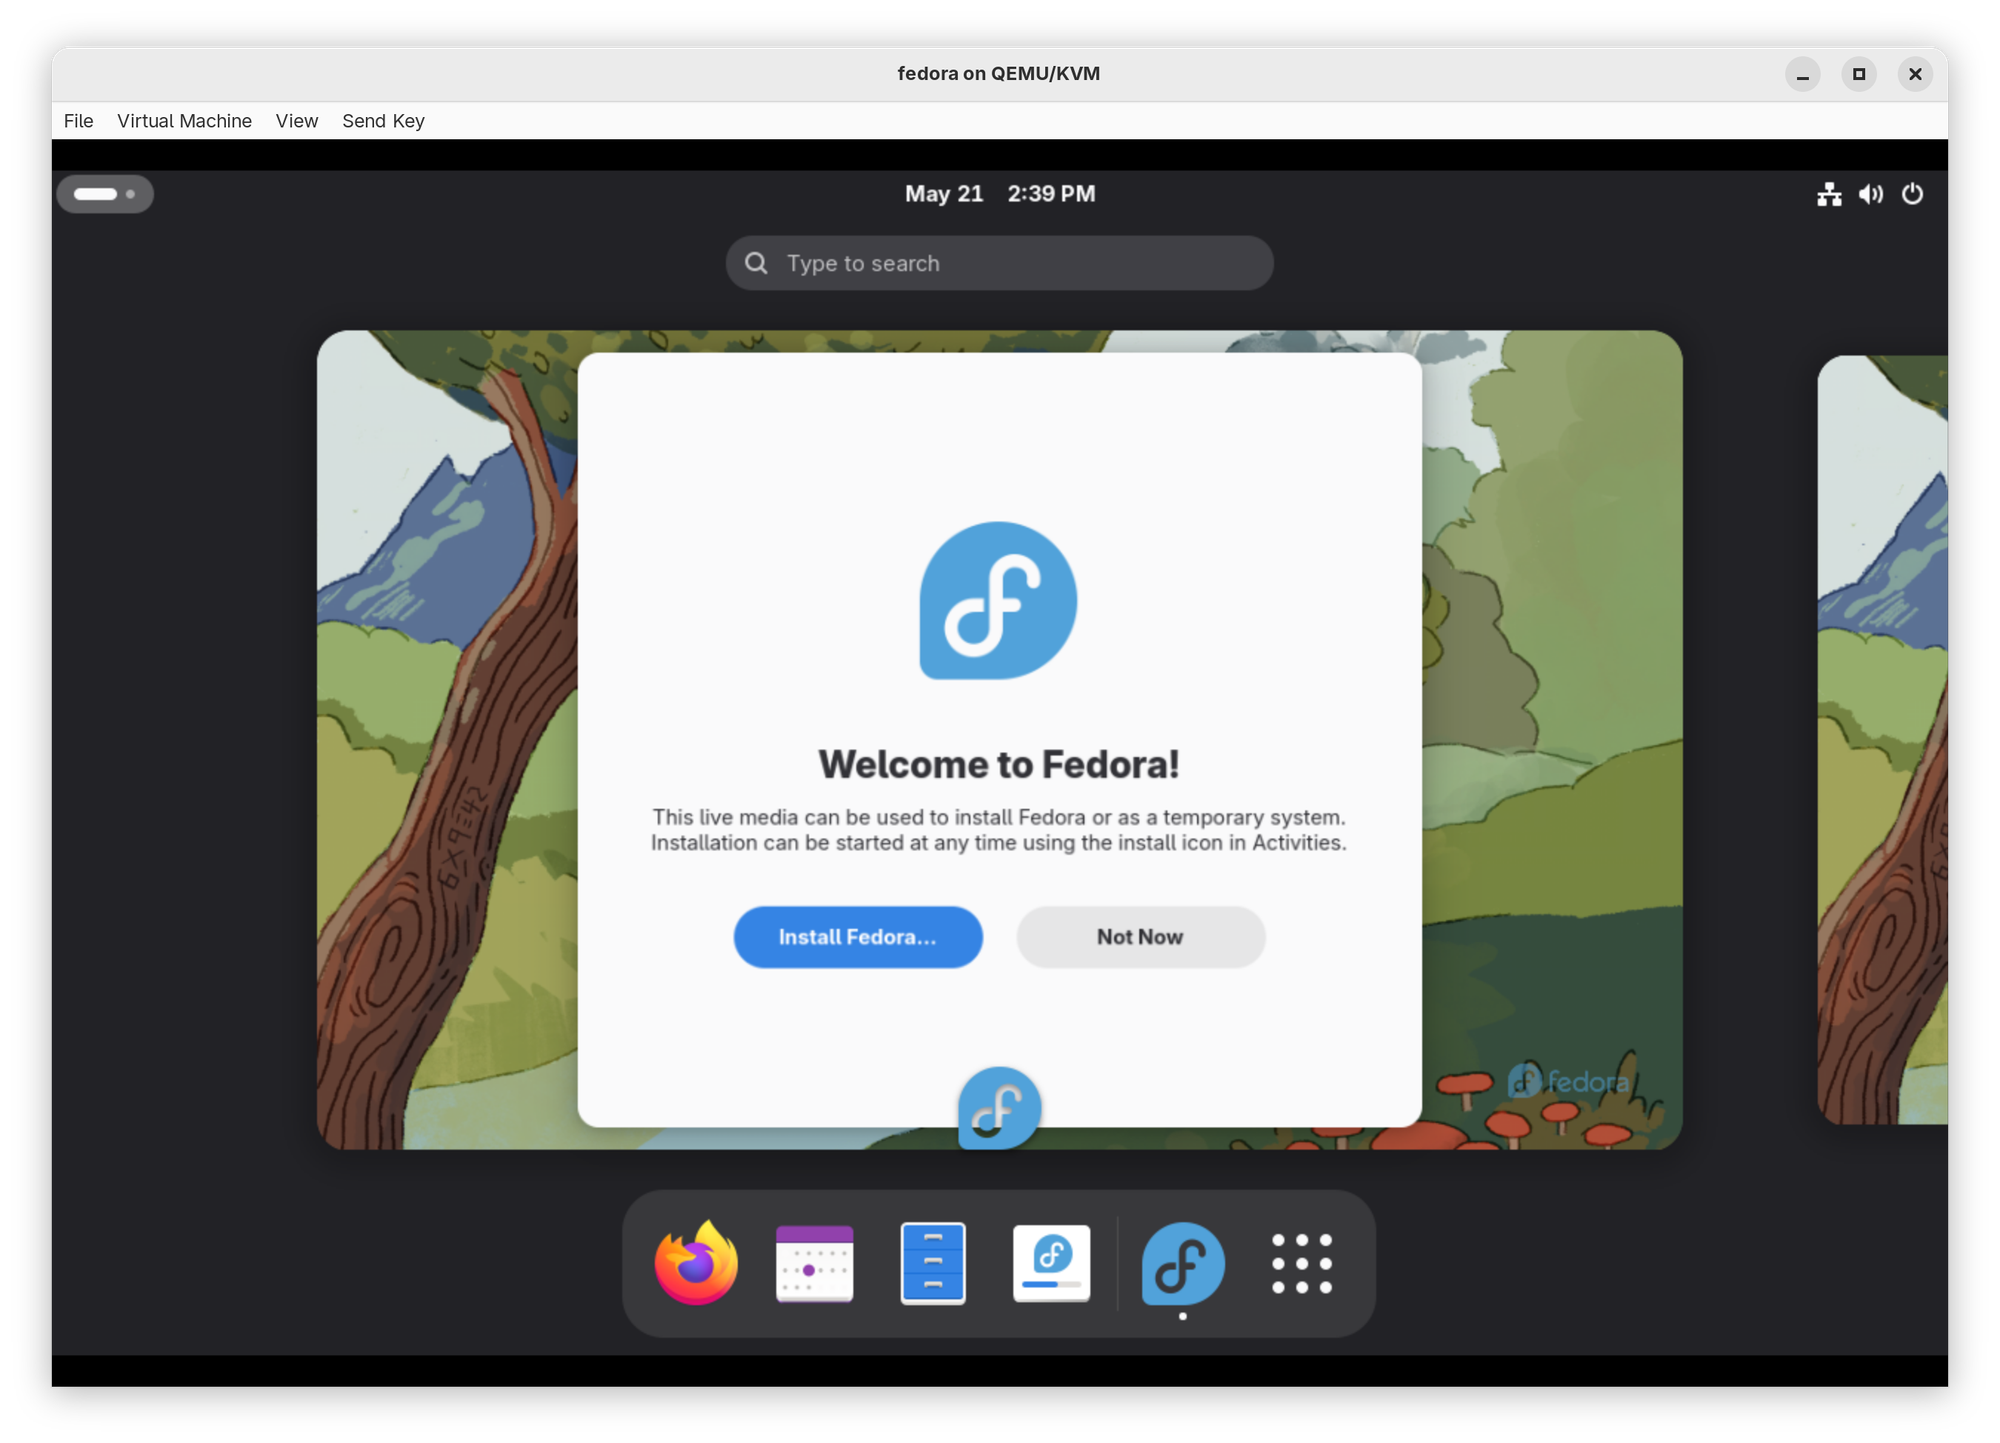
Fedora will now load and present you with the Fedora desktop. To begin the installation process, simply click Install Fedora
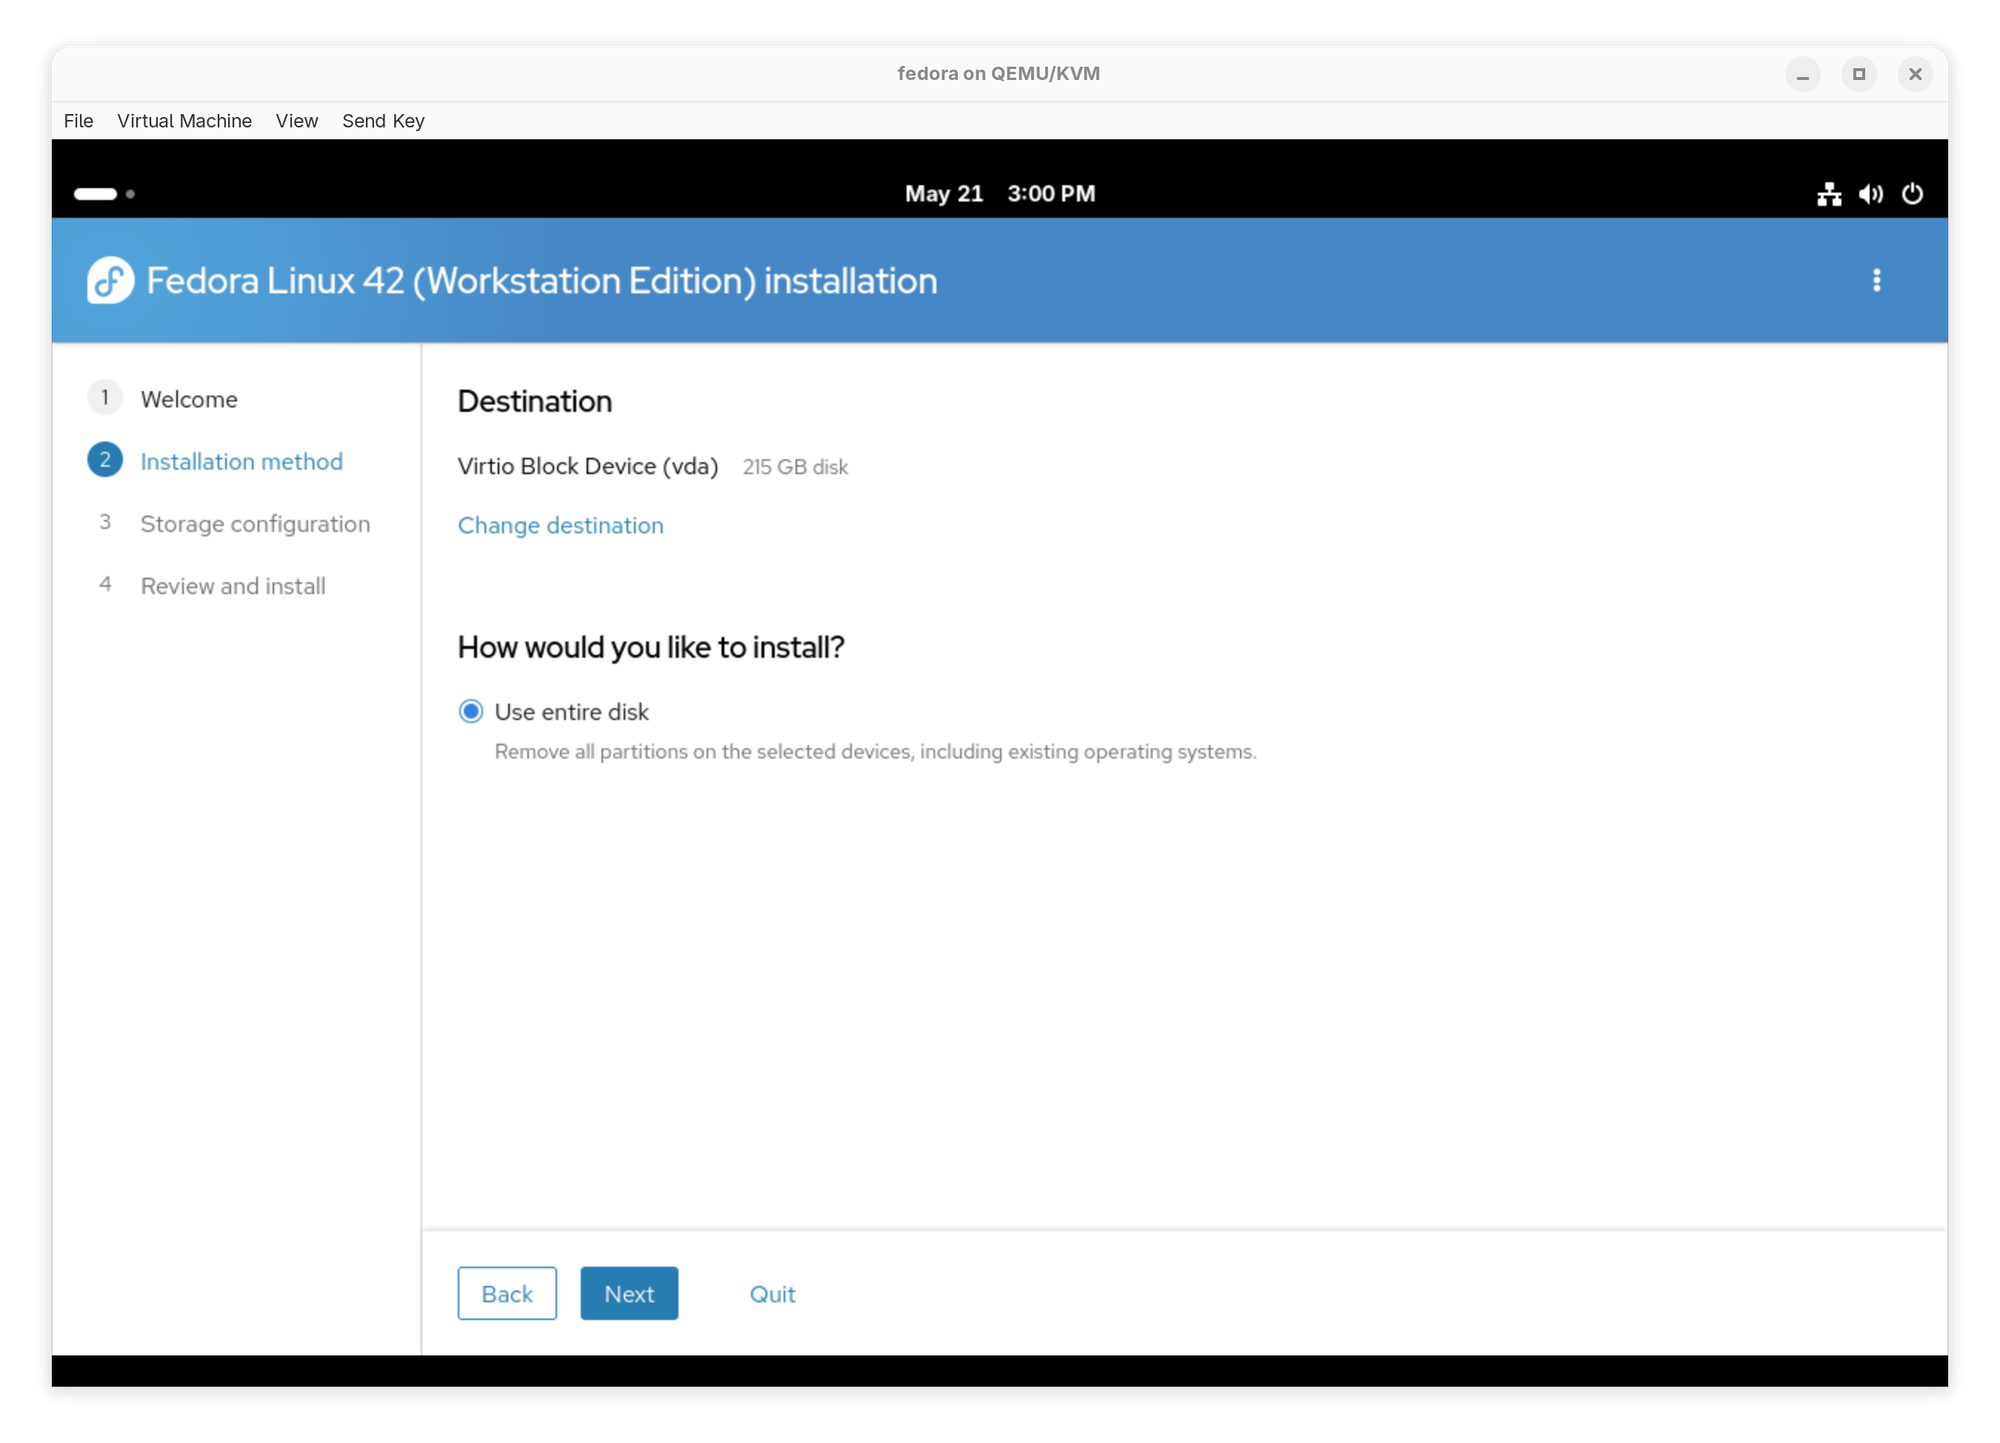
Next choose your local language and click Next. Under How would you like to install? select Use entire disk and click Next. You can make more advanced configuration changes by clicking Change destination but for the purposes of this guide, we are going to use the entire disk for Fedora and accept the default filesystem configuration.
The next screen will ask if you wish to encrypt the disk, uncheck Encrypt my data and click Next.
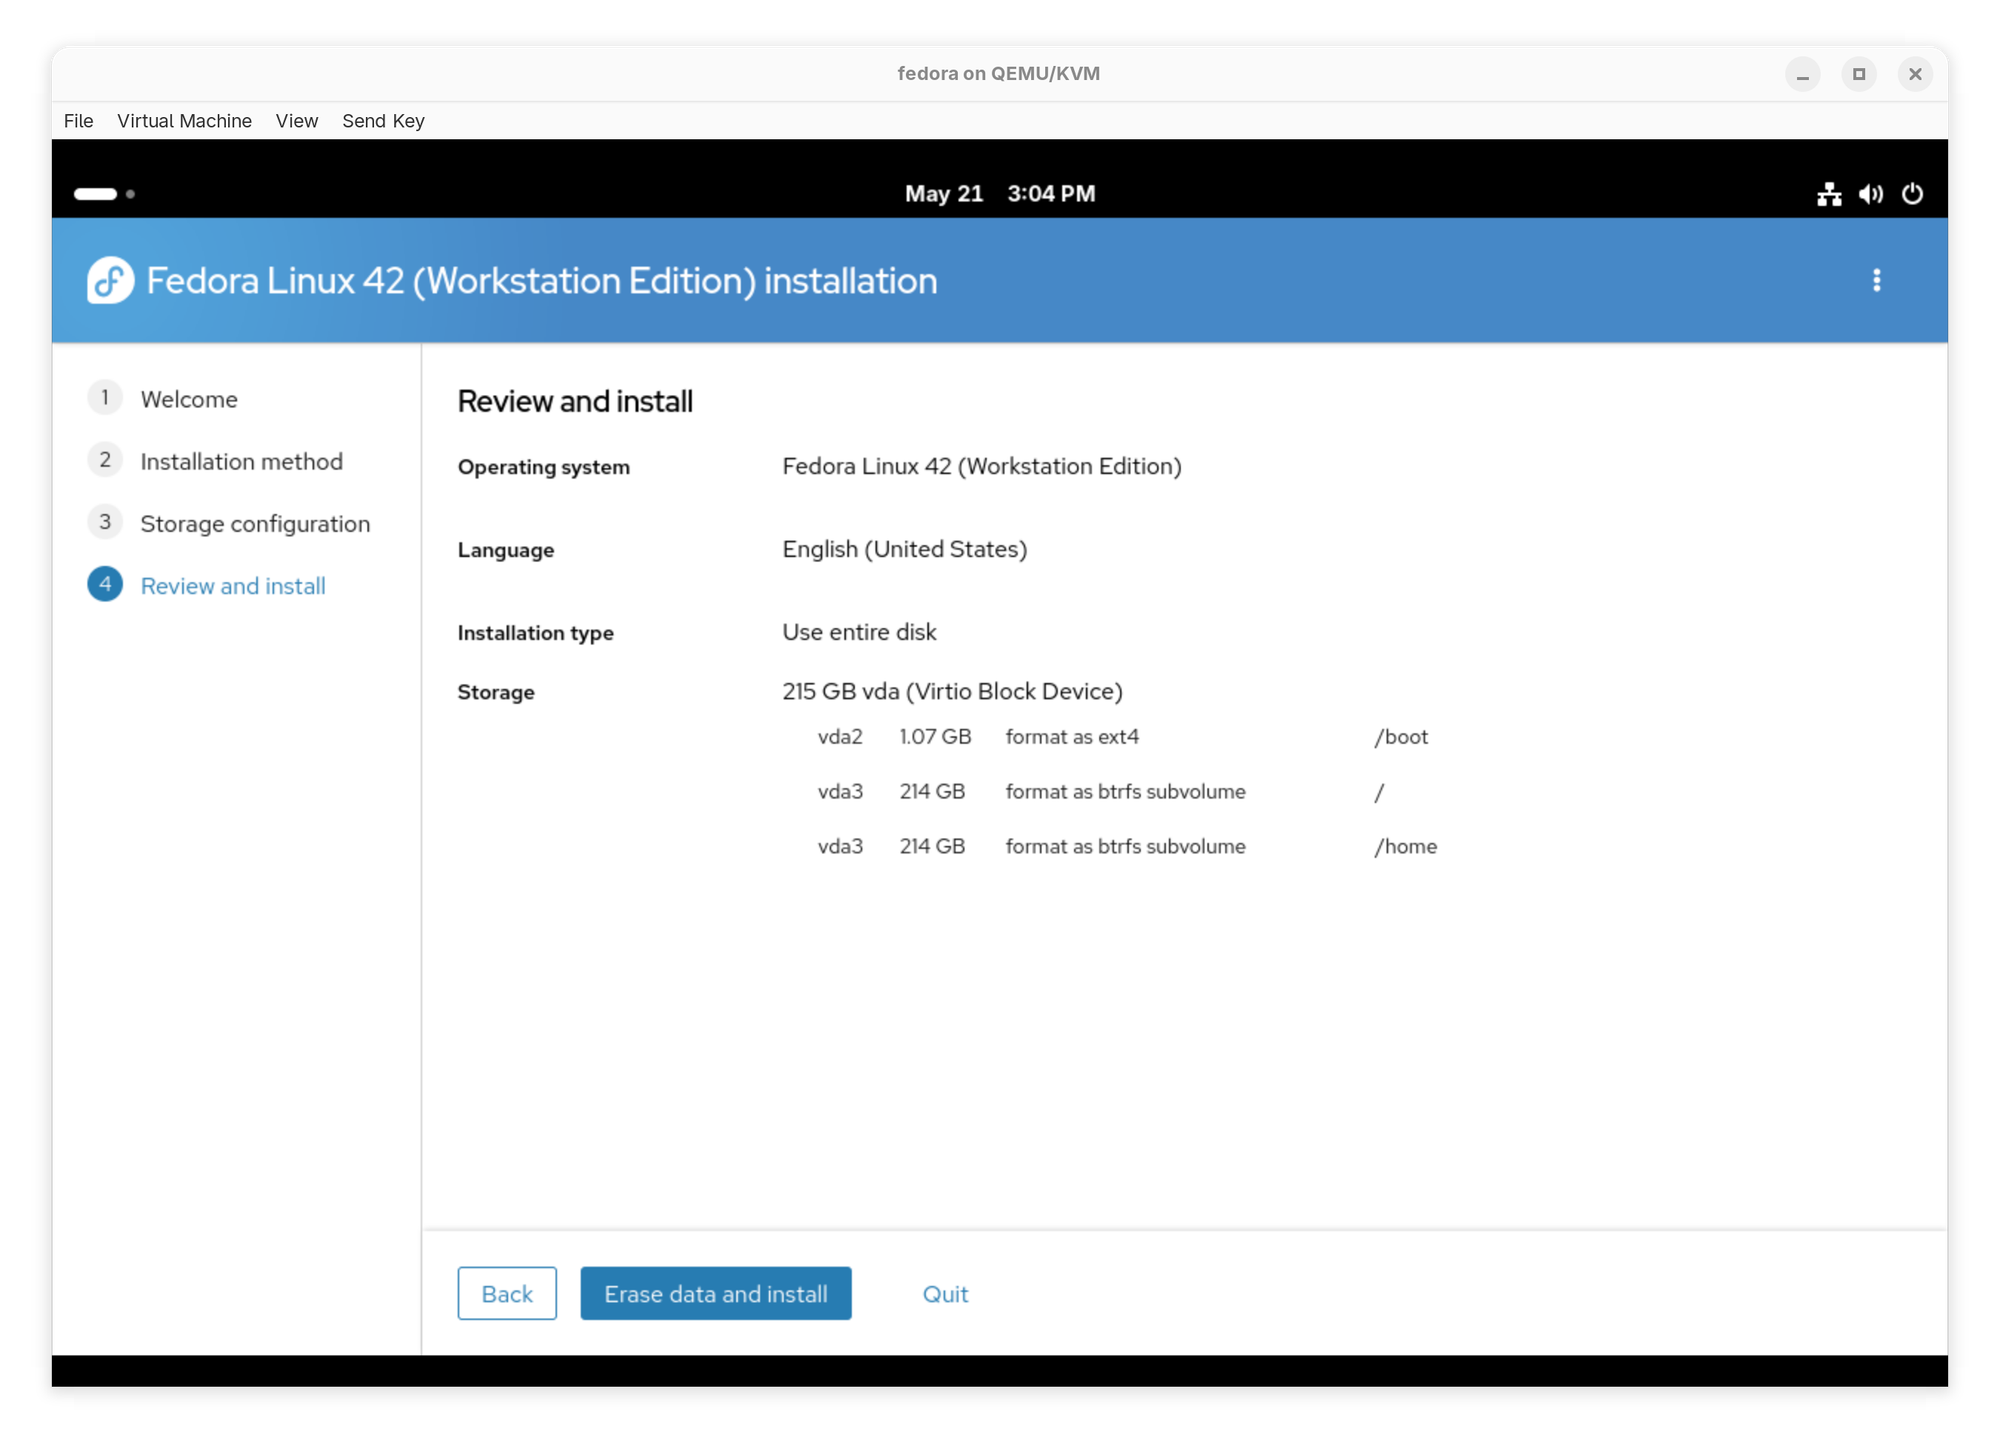
The final screen in the setup wizard will review all the options you selected in the previous screens. If everything looks good, simply click Erase data and install to begin installing Fedora to your hard drive.
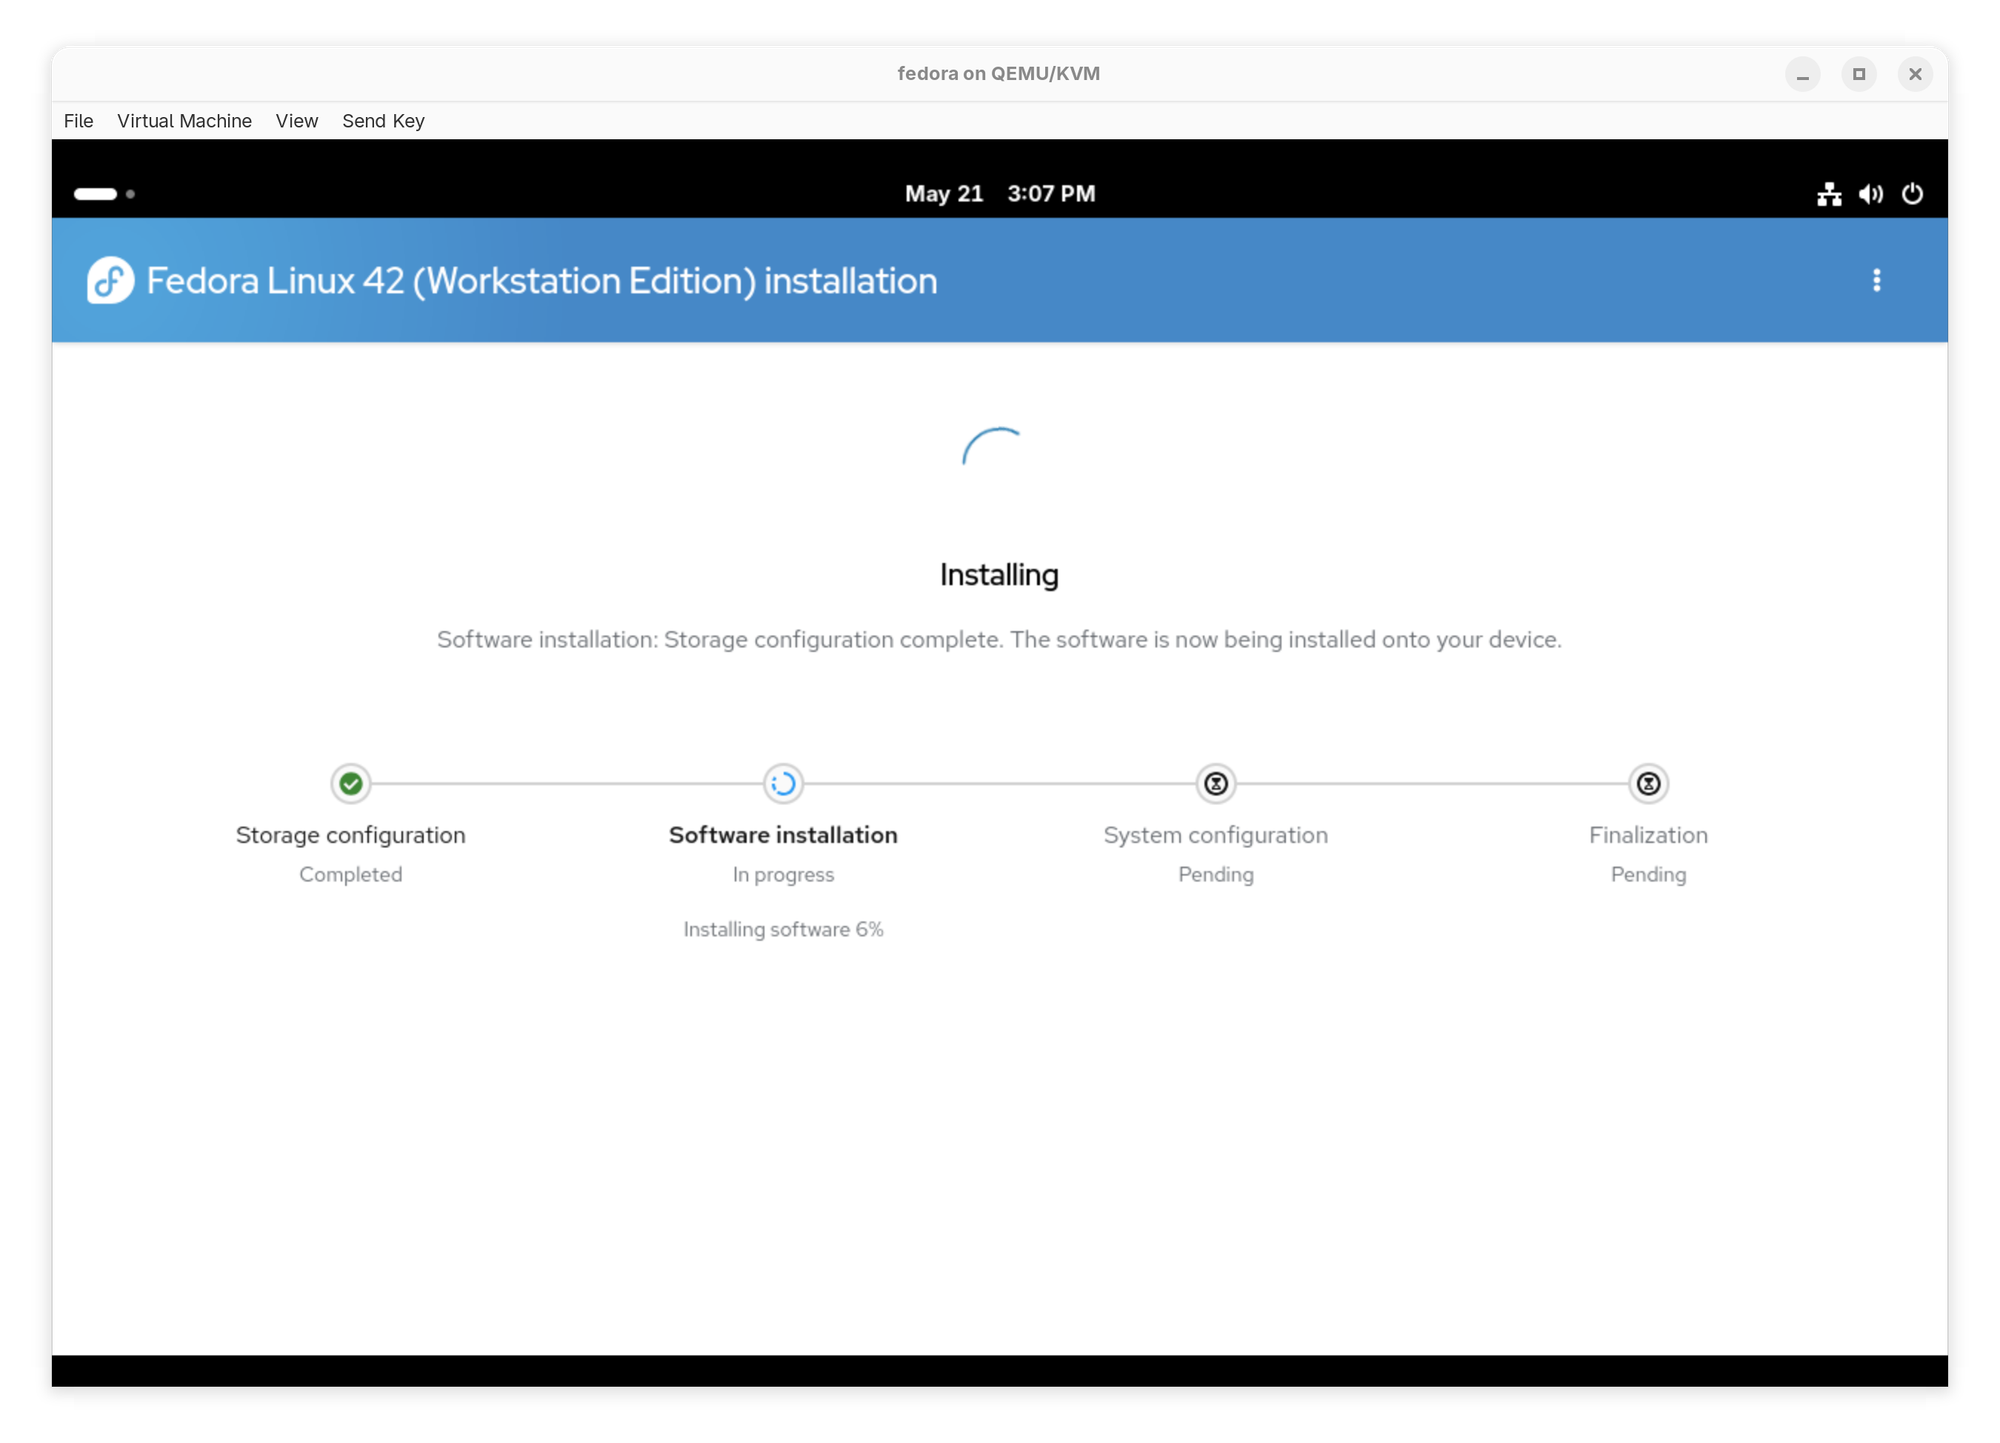
How just sit back and let the installer do it's thing. The new installer on Fedora 42 has made the setup much more streamlined and less confusing. It will display a progress bar with milestones until it's complete.
When completed you will be greeted with a green checkmark and message stating the install was a success. To restart your machine into you new install, click the power icon at the upper left-hand corner and select Restart. You may now remove the USB boot drive from the computer.

Step 4. Initial setup and configuration
When you first boot into the Fedora from your hard drive it won't look too dissimilar to the live USB environment except you will now be greeted with the initial setup wizard for configuring your user account. First select a language and click Next followed by selecting a keyboard layout for your region and again click Next.
On the next screen decide if you want location services enabled and if you want Automatic Problem Reporting turned on. Then click Next and select your timezone the map.
The next screen will ask you if you want to enable Third-Party Repositories. In the Linux world, a repository is an online server where software is housed that can be installed and updated from. Initially Fedora comes with the standard Fedora repository enabled which is isolated to packages and apps selected by the Fedora team for inclusion in the distribution. Enabling the third-party repos opens your system up to a much larger catalog of apps. Click Enable Third-Party Repositories button and then click Next

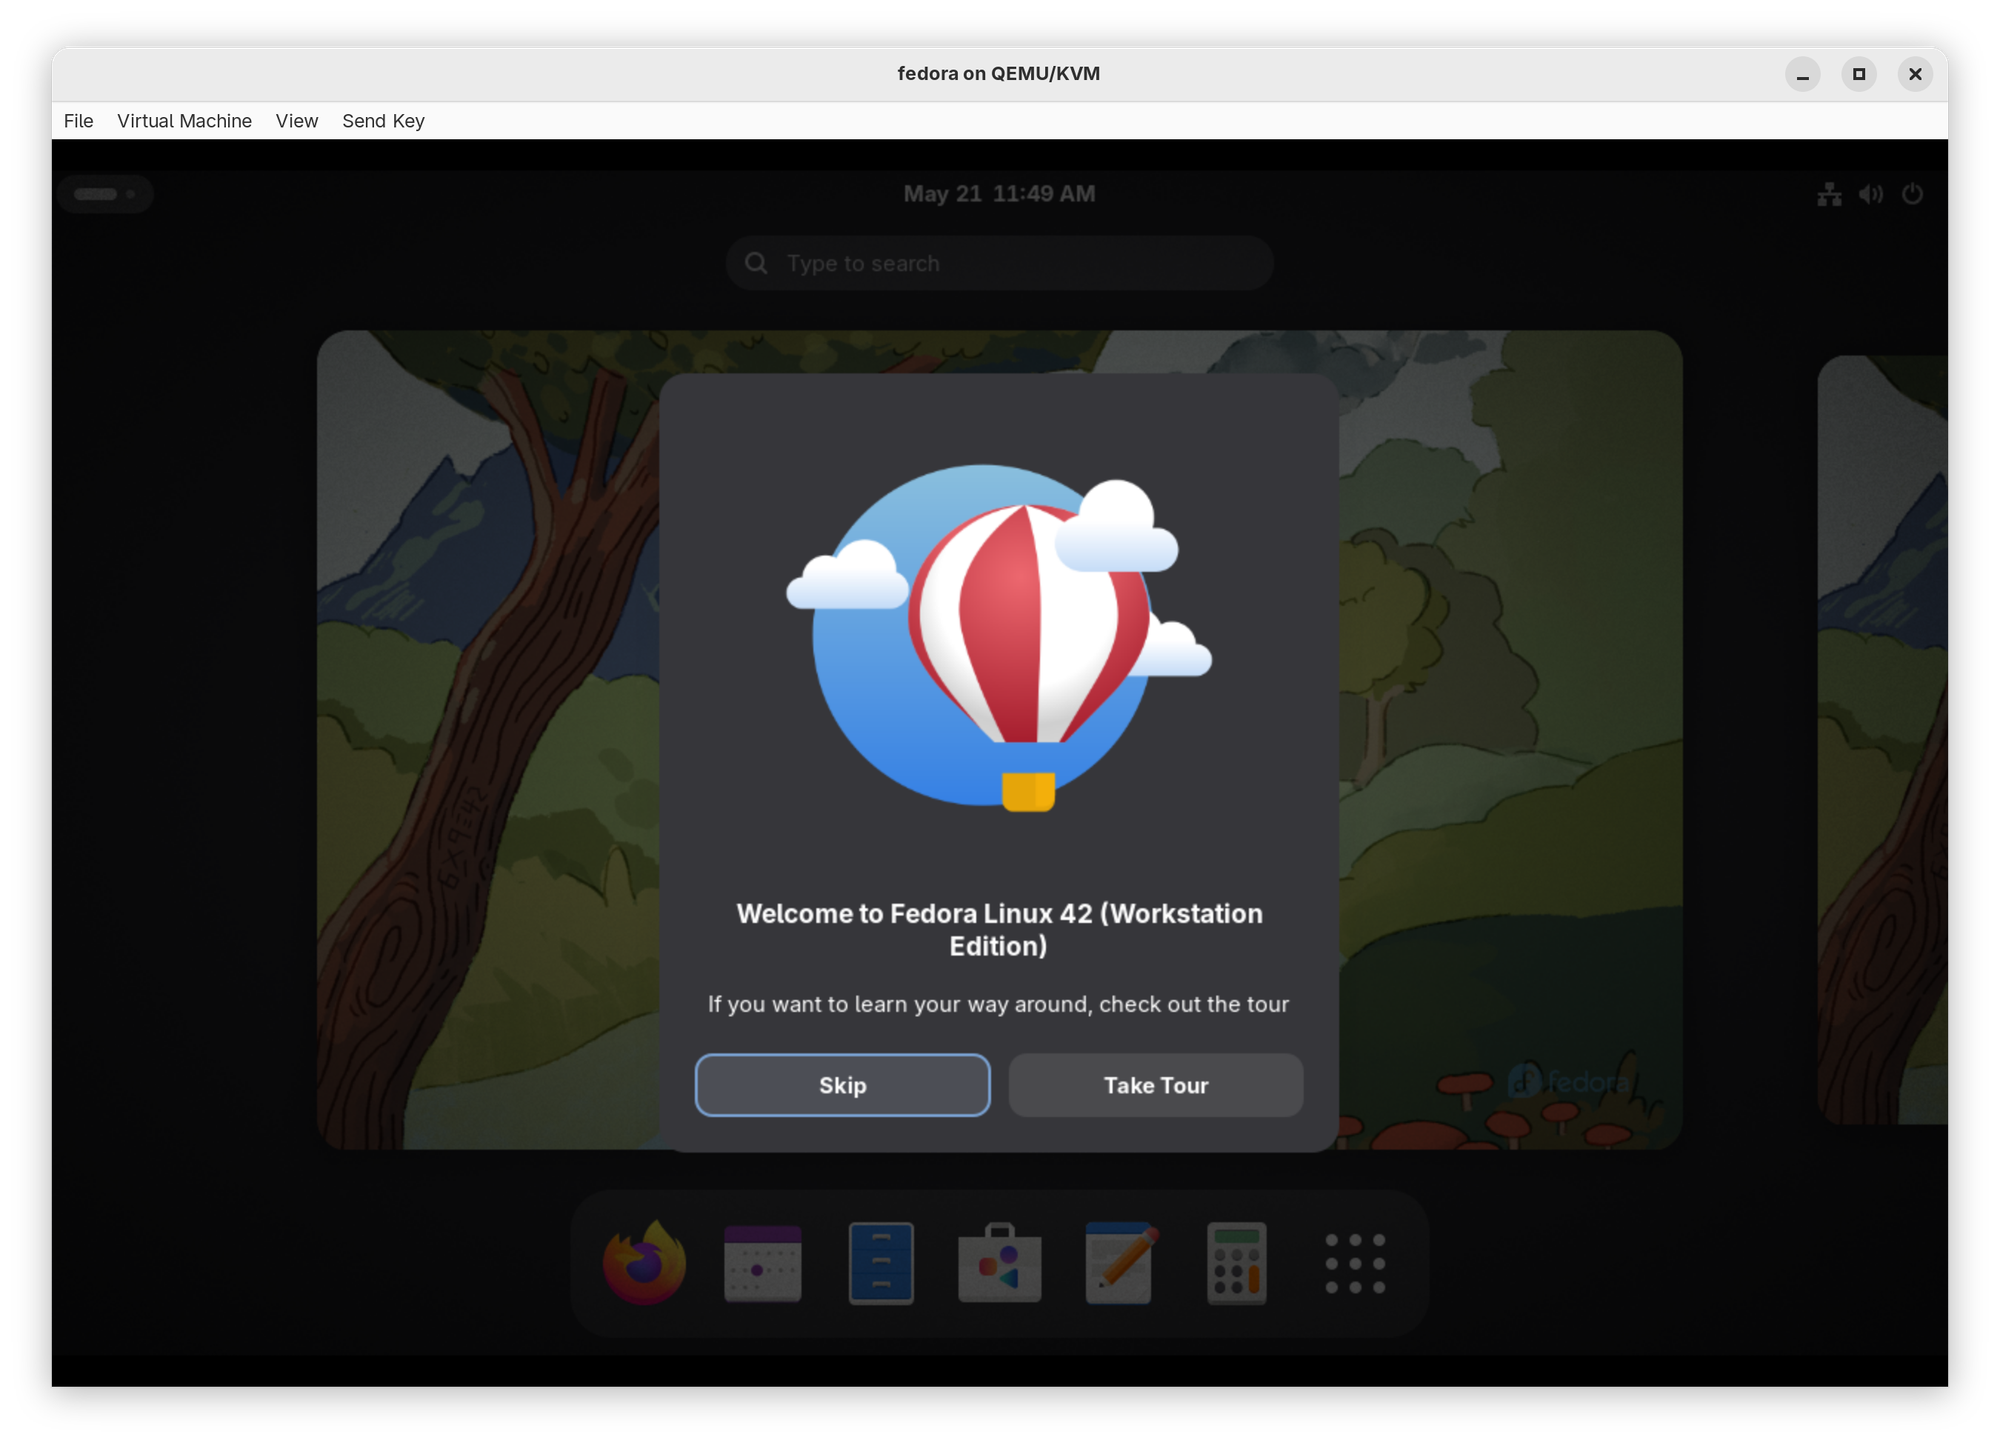
The next screen will ask for your full name and then a desired username. Fill these out and click Next to set your user account password. Make it easy to remember as you will be inputting this every time you unlock your computer. Finally click Next and the initial setup is complete. Click Start Using Fedora Linux to close the wizard and land on the desktop. A welcome screen will appear asking if you want to take a tour of the interface. I encourage you to do this so you become familiar with where things are and how they operate.
Step 5. Understanding the Gnome desktop
The default Gnome desktop environment on Fedora Workstation switching between desktop view, overview and app grid
Unlike Windows or macOS, the Linux ecosystem allows for desktop users to choose their desktop environment. A desktop environment (or DE) is the graphical user interface of the operating system. It contains a set of software that handles how application windows render and look, where to access certain things like settings, how to browse files, an app store for installing new apps, where app indicator "tray" icons live, how to display open applications, and other vital functions of a desktop computing environment. One of the most popular environments is called Gnome (pronounced guh-nome) which is the default DE on Fedora Workstation. Other popular DEs are KDE Plasma, XFCE, and Cinnamon.
Gnome is designed to be minimalist while supplying only the necessary functions and hiding visual noise and clutter. It takes a lot of queues from macOS but has some unique features that even exceed Apple's design philosophy in many ways. Gnome most notably gets out of your way so you can focus on the task at hand. As you can see from the looping video above, the default desktop maximizes vertical screen real estate allowing the user to see more content on-screen than some other DEs. (Learn more about Gnome at gnome.org)
Moving the cursor to the top left corner will reveal the overview displaying the dash panel (bottom bar with app icons), open application windows, and virtual desktops. You can also press the Super (Windows key / Option key on Mac keyboards) key to reveal and hide the overview.
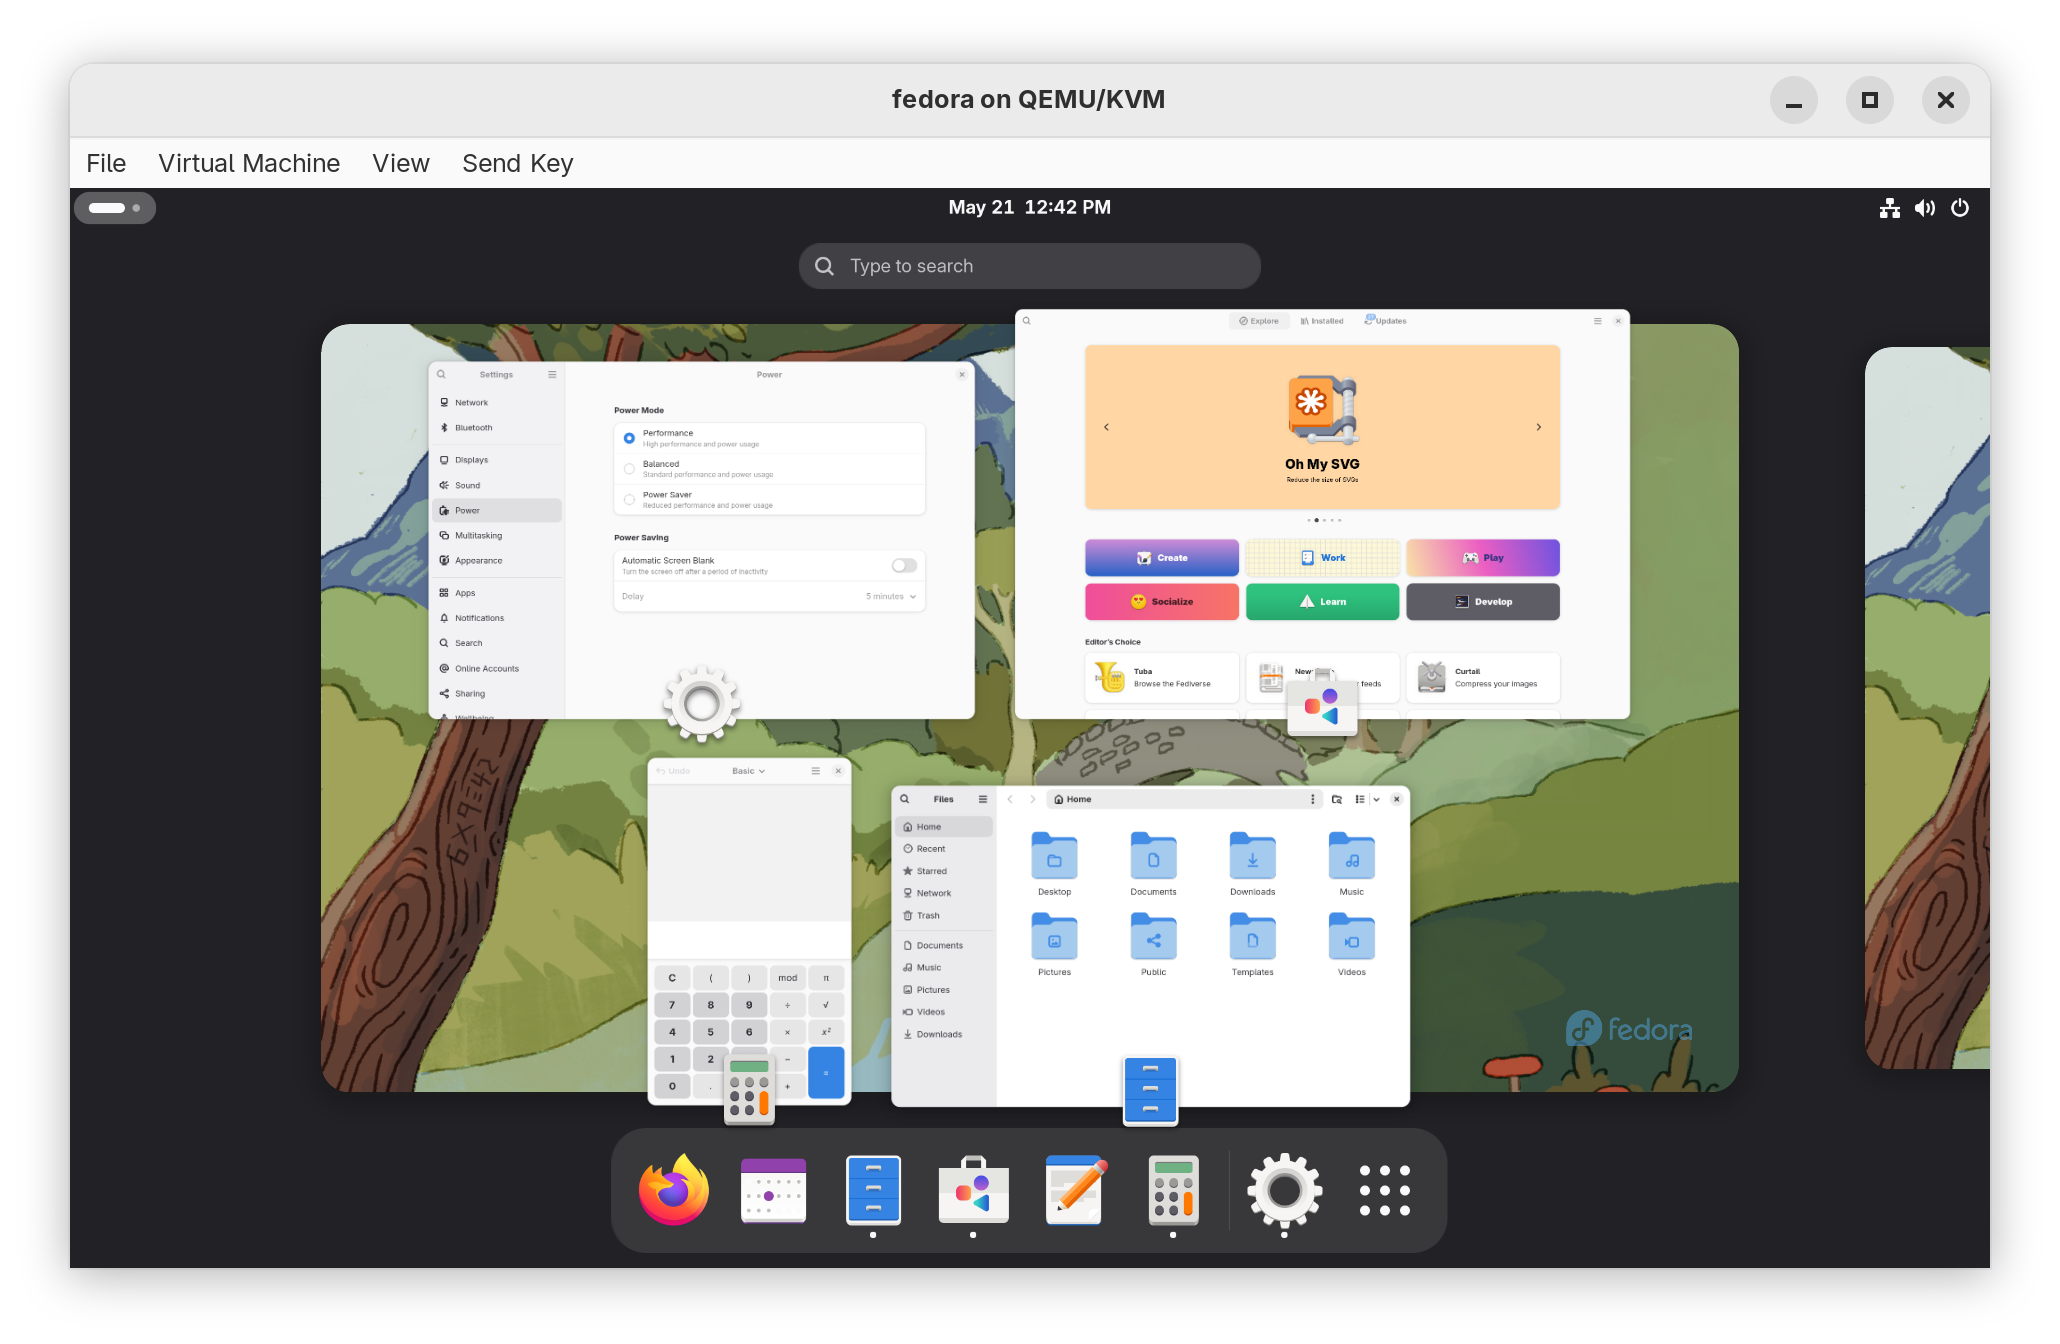
While in the overview you can click the Show Apps button on the dash panel to reveal a grid of installed application icons. Simply click on an icon to launch that app. You can also start typing an app's name while in the overview and it will surface matches automatically. I use this function all the time. Really makes accessing apps swift and painless. No menus, just one key press and start typing!
The only screen element that remains continuously in view is the top bar which displays the date and time along with a control center-like widgets in the upper right hand corner for changing wifi and power settings, turning the machine off/restarting, adjusting audio etc. We will customize this bar in the next section with extensions.
Explore around the Gnome desktop environment and get familiar with where things are. It's very intuitive once you get used to it. I find when I return to macOS or Windows, I am shocked how cumbersome they are in comparison.
Step 6. Updating Fedora and installing apps
Before we continue, let's get familiar with the update process in Fedora and how to install a application that will help us do a few things later in the guide. First, lets locate and launch the Software Store app. When it opens, click on Update and then Download to get the latest packages. For my fresh install of Fedora 42, there are 27 apps that need updated.
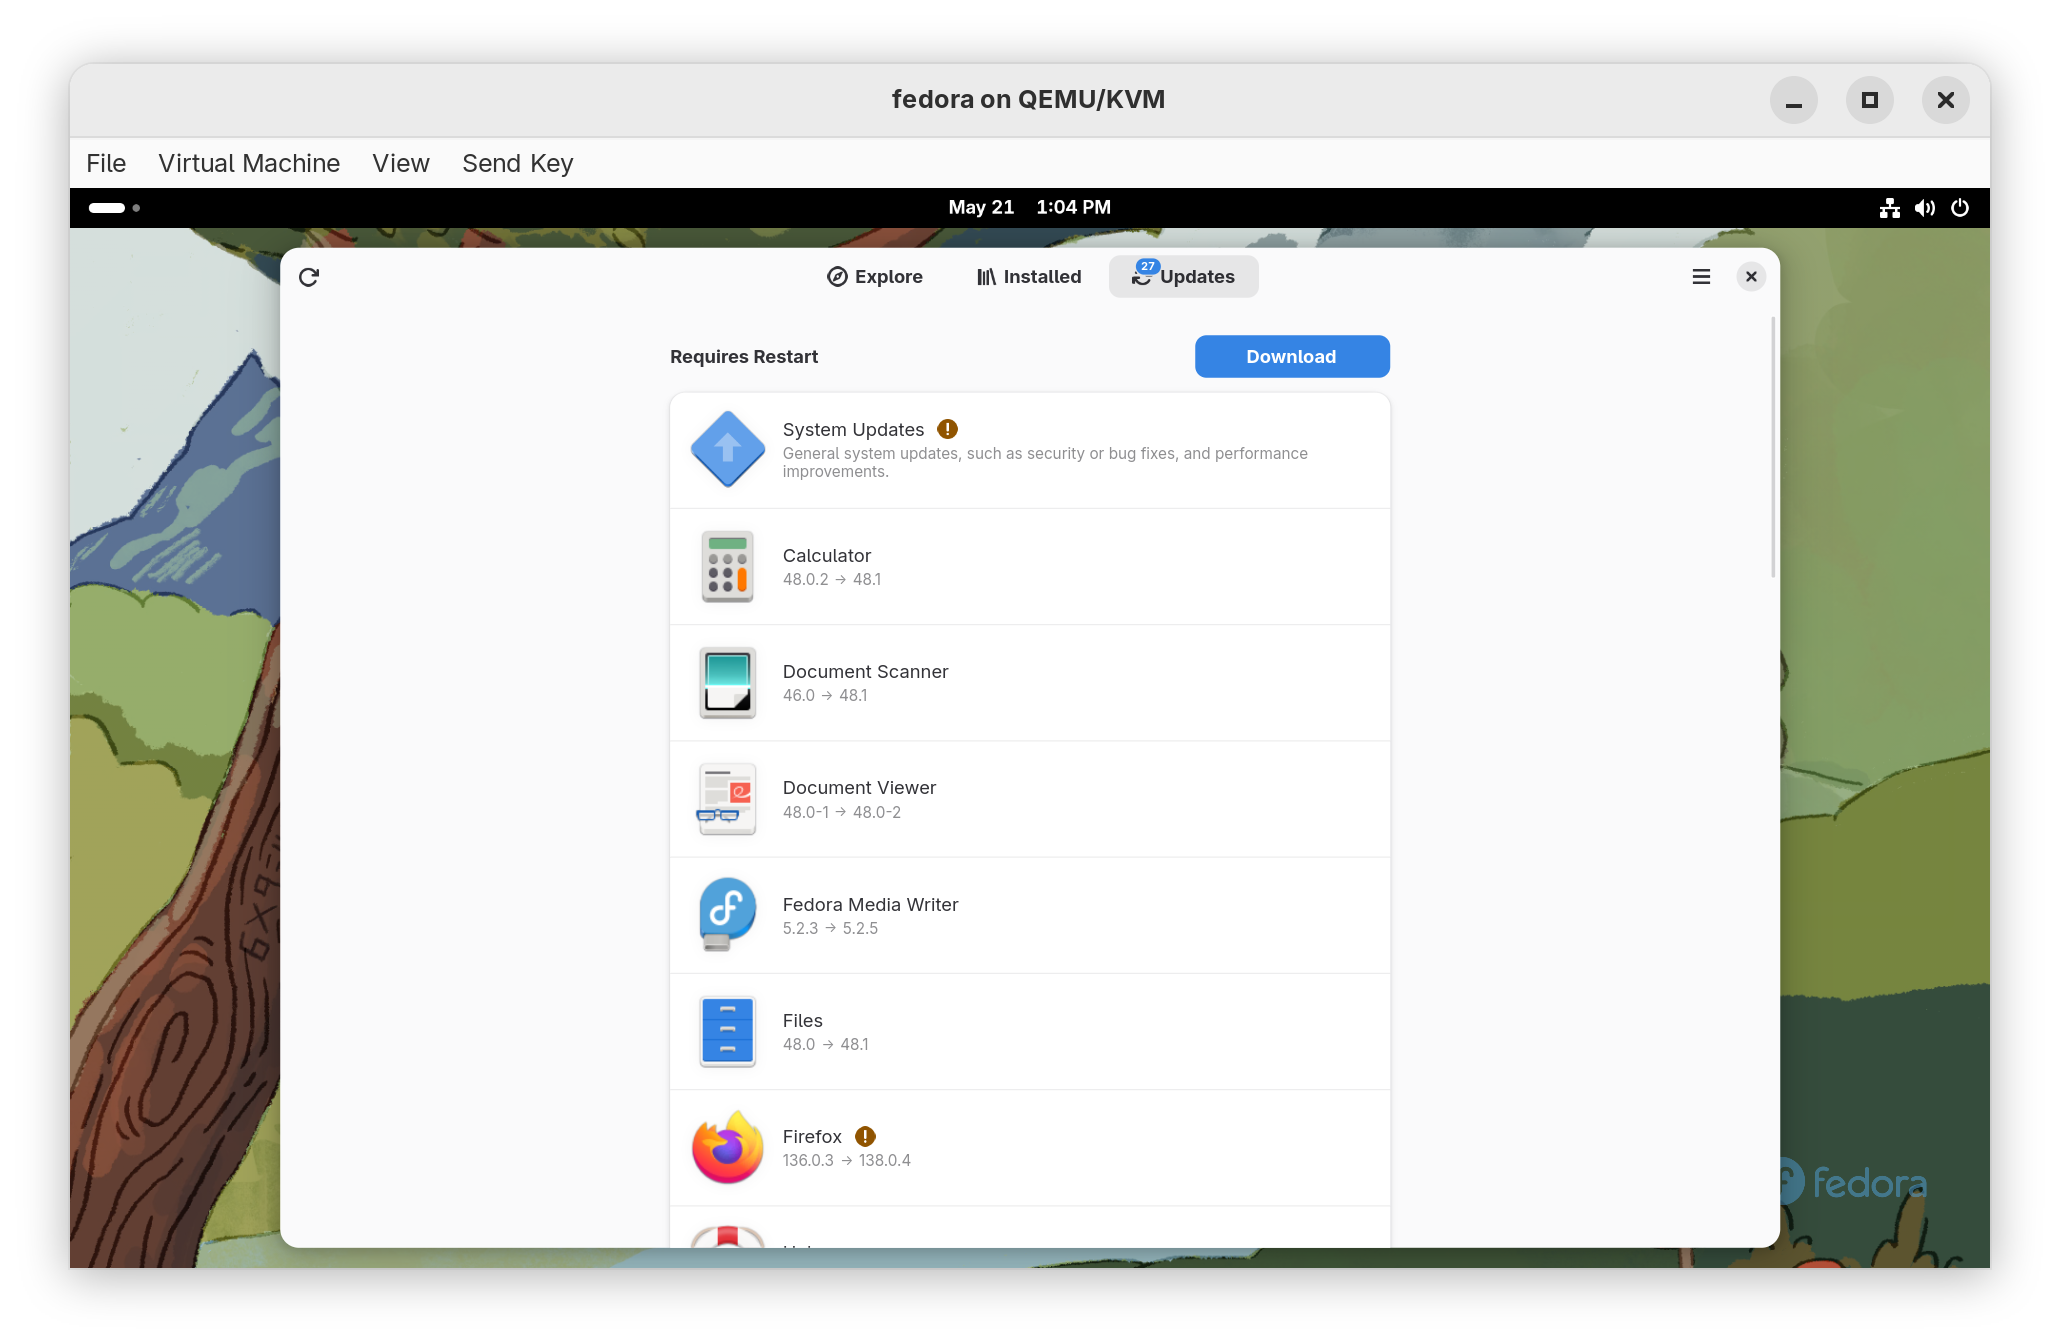
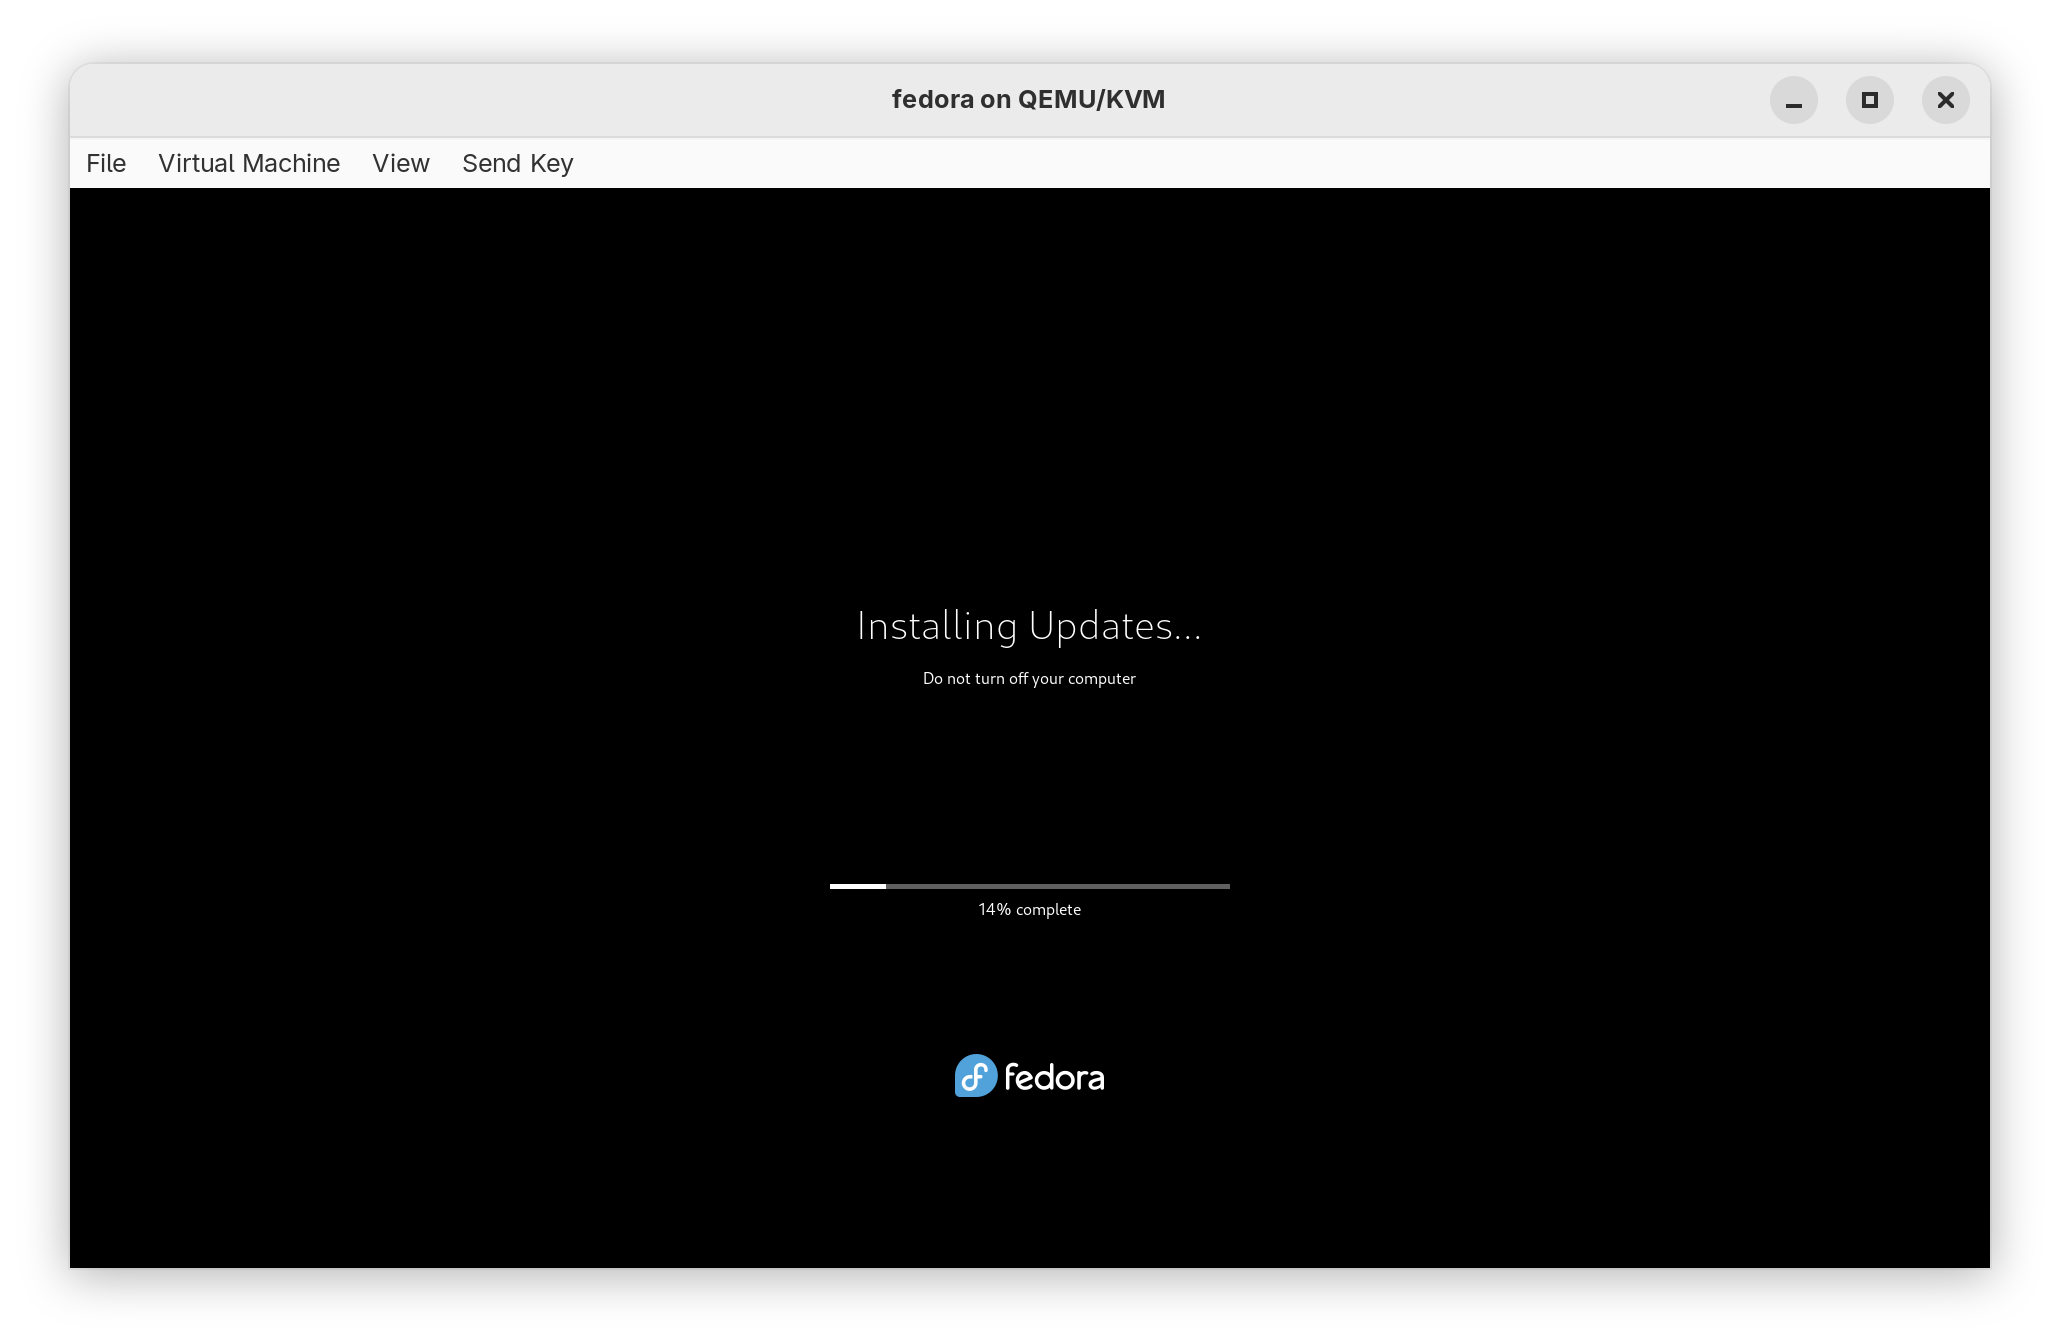
Once downloaded, click Restart & Update to begin the update process. This shouldn't take very long. Let the system apply the updates and then return you to the desktop.
Now let's install an app. Open up the Software Store again and search for an app called Extension Manager. Note this is a "Flatpak" app that resides in the Flathub repository, one of the third-party repos we enabled earlier in the guide. Flatpak is an application format on Linux that bundles together all pieces of dependent software an application needs to run. In Linux/Unix parlance these are called "dependencies" and with traditional Linux/Unix software, these can be a bit of a pain to manage.
With Flatpaks however, everything is included within the app package so it will just run without needing external dependencies. Most Windows and macOS apps work like this. Mobile apps function in this way as well so when you download an app on the iOS or Google Play app stores, you don't need to configure anything else for them to work.
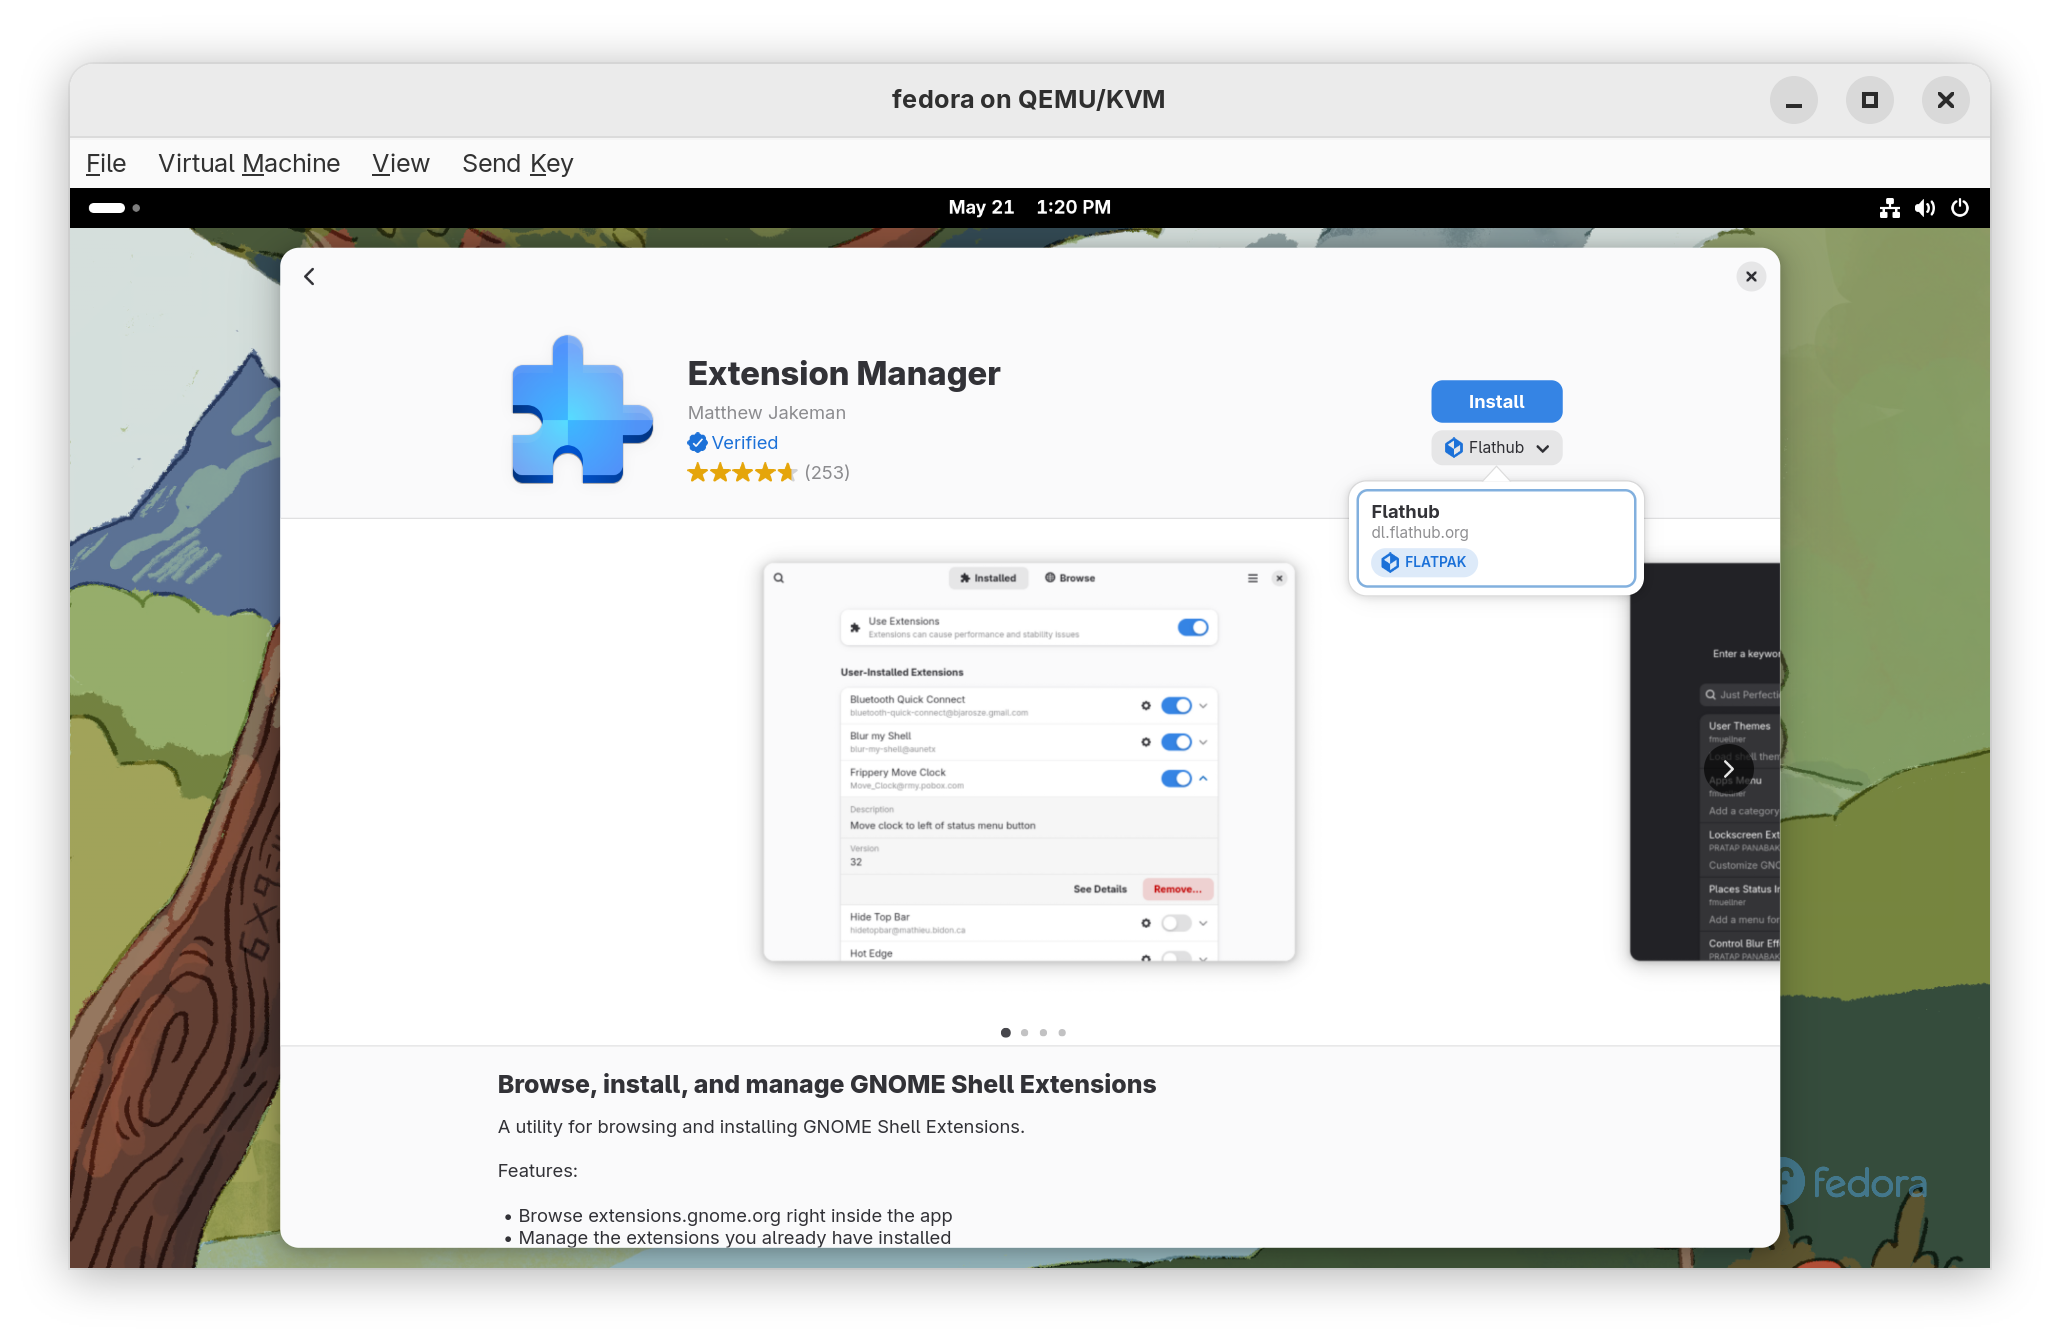
Click Install to install Extension Manager then open the app before continuing.
Step 6. Adding useful extensions to Gnome
Gnome is designed to be minimal but can easily be expanded to meet any user's needs by installing certain extensions. Extensions can be managed and installed via an app called Extension Manager. Open the app and browse for the following extension:
- Appindicator and KStatusNotifier Support
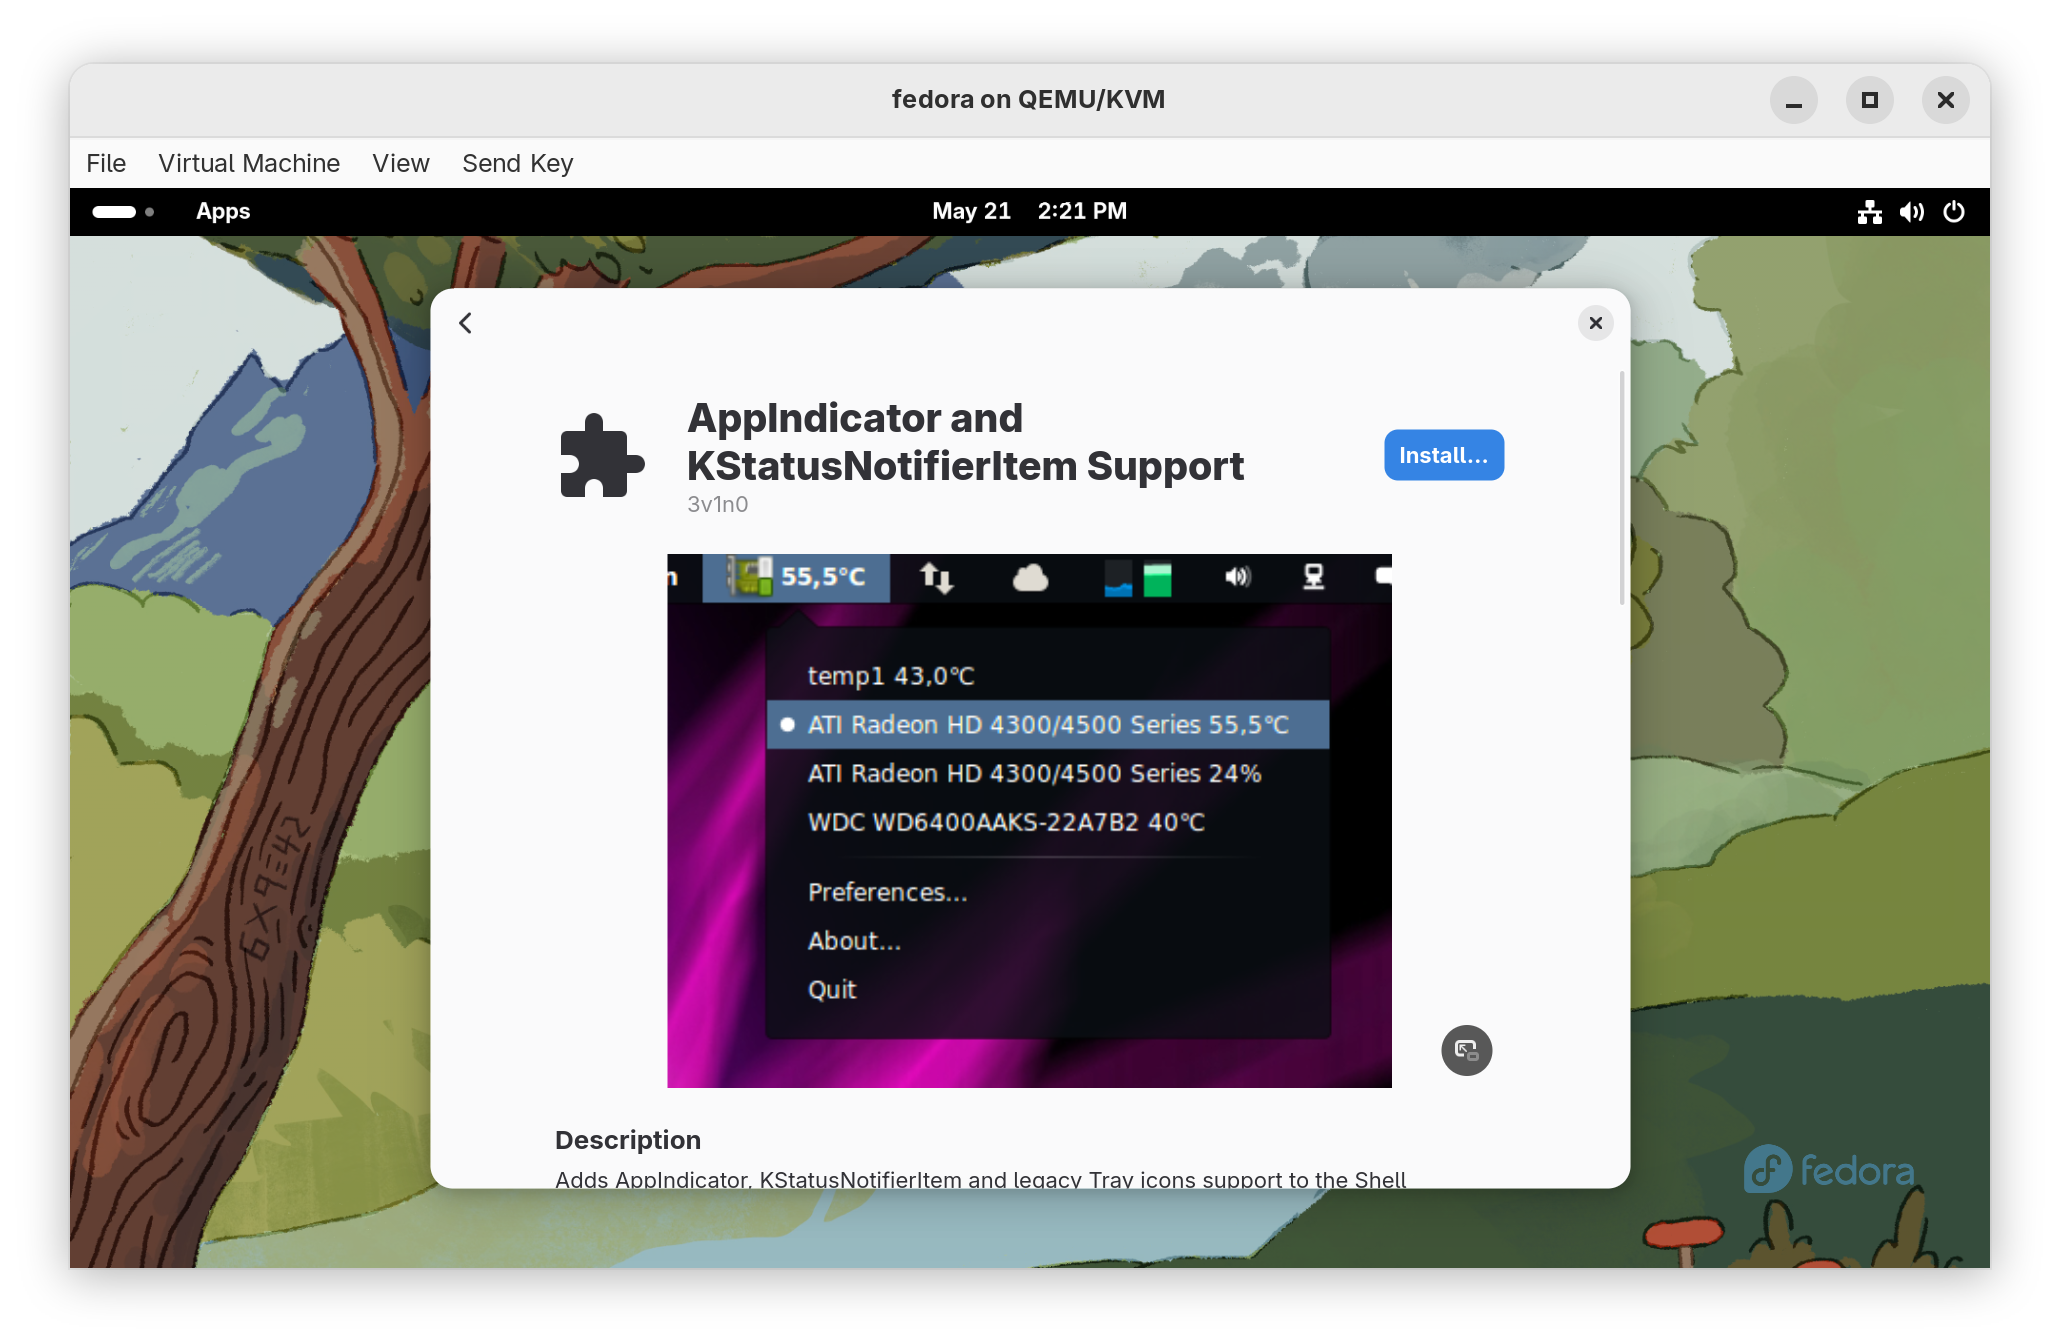
This extension provides vital support for "system tray" app icons that appear in the topbar of Gnome. Very useful for apps that act more like services than full applications such as Dropbox, or for apps that give you indicators of their status like OBS, Discord or Syncthing.
There are many extensions that can be added to extend or change the functionality of Gnome including ones that convert the dash into a fixed taskbar-like panel that mimics Windows 10 or others that blur the out-of-focus elements for better style and visibility. Explore extensions and make Gnome your own! Just be careful sometimes an extension can break certain parts of the user interface or make things behave in irregular ways. Use them wisely and appropriately.
Step 7. Install Gnome Tweaks and Flatseal
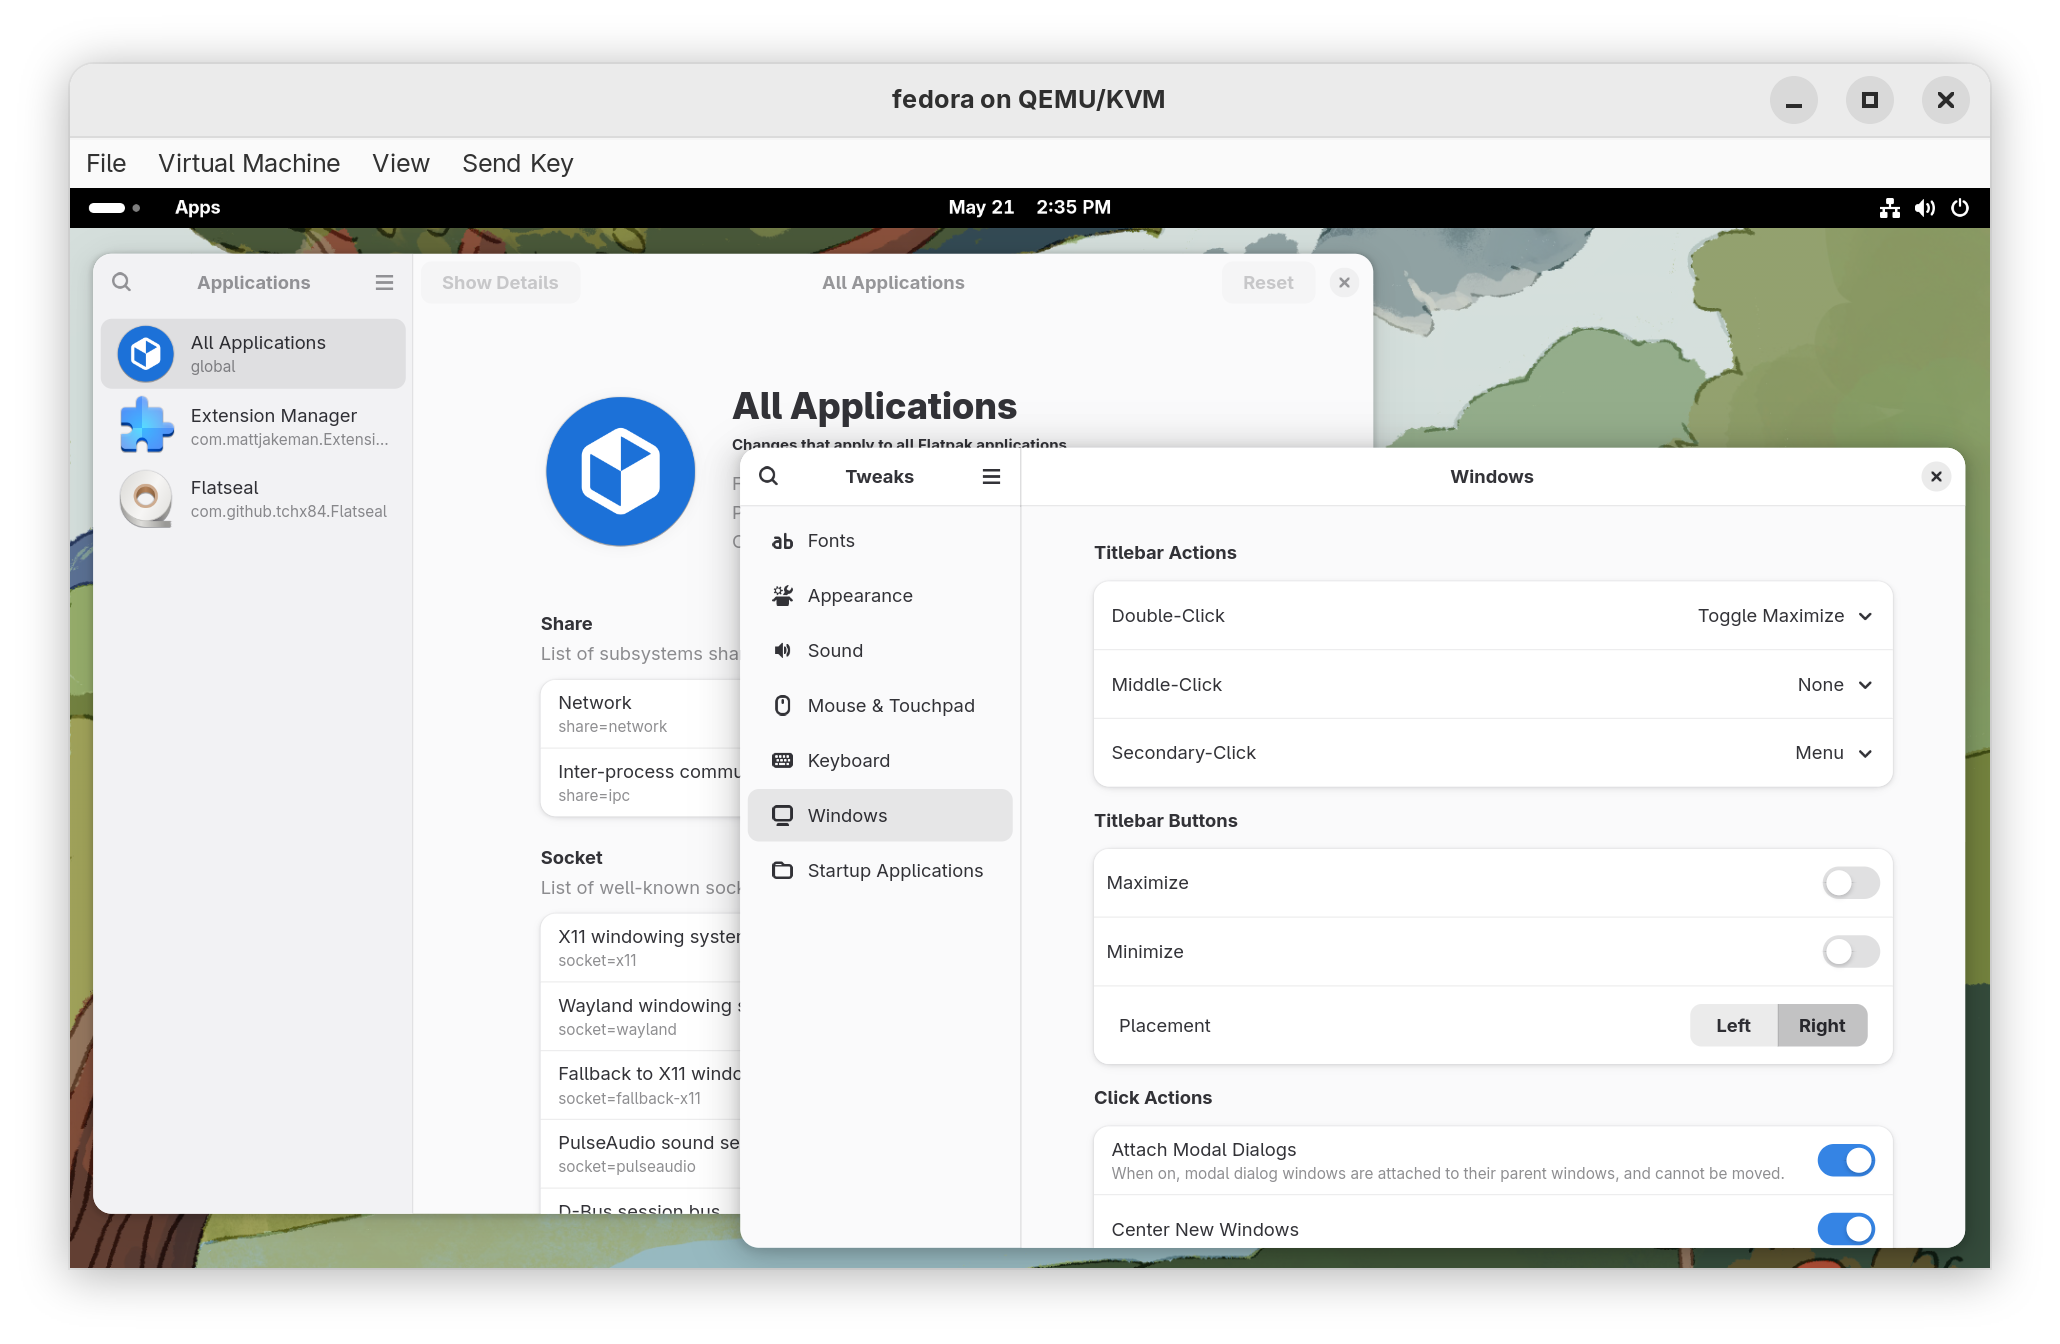
Let's return to the Software Store and install two applications: Gnome Tweaks and Flatseal. Gnome Tweaks is a handy little app for making changes to the look and feel of Gnome outside the scope of extensions. You can change things like adding back in the minimize/maximize buttons, changing the UI font and size and other useful tweaks.
Flatseal is a handy application that will help you troubleshoot issues when they arise with Flatpak applications. You may never need to use it but if you're having trouble launching a Flatpak app, go to Flatseal and see if there are any settings you can change to resolve your issue.
Step 8. Install your apps and migrate your data
The final step in our process is most unique to you and your needs. Go ahead and search the Software Store for your favorite apps and install them. Get their accounts setup and connected, sync your data over and get back to doing what you love. Connect that external hard drive and use the Files app in Gnome to move your files back into place in your home directory. Make Fedora yours.
Final thoughts moving forward
You've successfully installed Fedora and managed to install some apps and extensions. Now the fun part is getting deeper into the Linux ecosystem. You will have questions, probably lots of them. Windows is very different structurally from Linux but mastering the Linux way of doing things will broaden your confidence when working with computers. Linux dominates in the datacenter and dwarfs the Windows userbase if you account for Chromebooks and Android devices. Linux is everywhere and so, the more familiar you are with it, the better you will be prepared for what's to come.
If you're stuck, I've found ChatGPT can be the best help when I encounter a tricky question about Linux. Simple open up Chat, pose the question as detailed as you can and the follow the instructions on how to resolve it. The answers are surprisingly thorough and have gotten me out of a jam many a time! Of course, you can always hit me up on Bluesky and I'll be happy to point you in the direct direction.
Linux and open source software put the excitement and possibility back into computing. You now control your computer from start to finish and that's something I've found very satisfying the more I use and learn the Linux desktop.
As always, thanks for reading! You can find me on Bluesky @hyprlab.co